




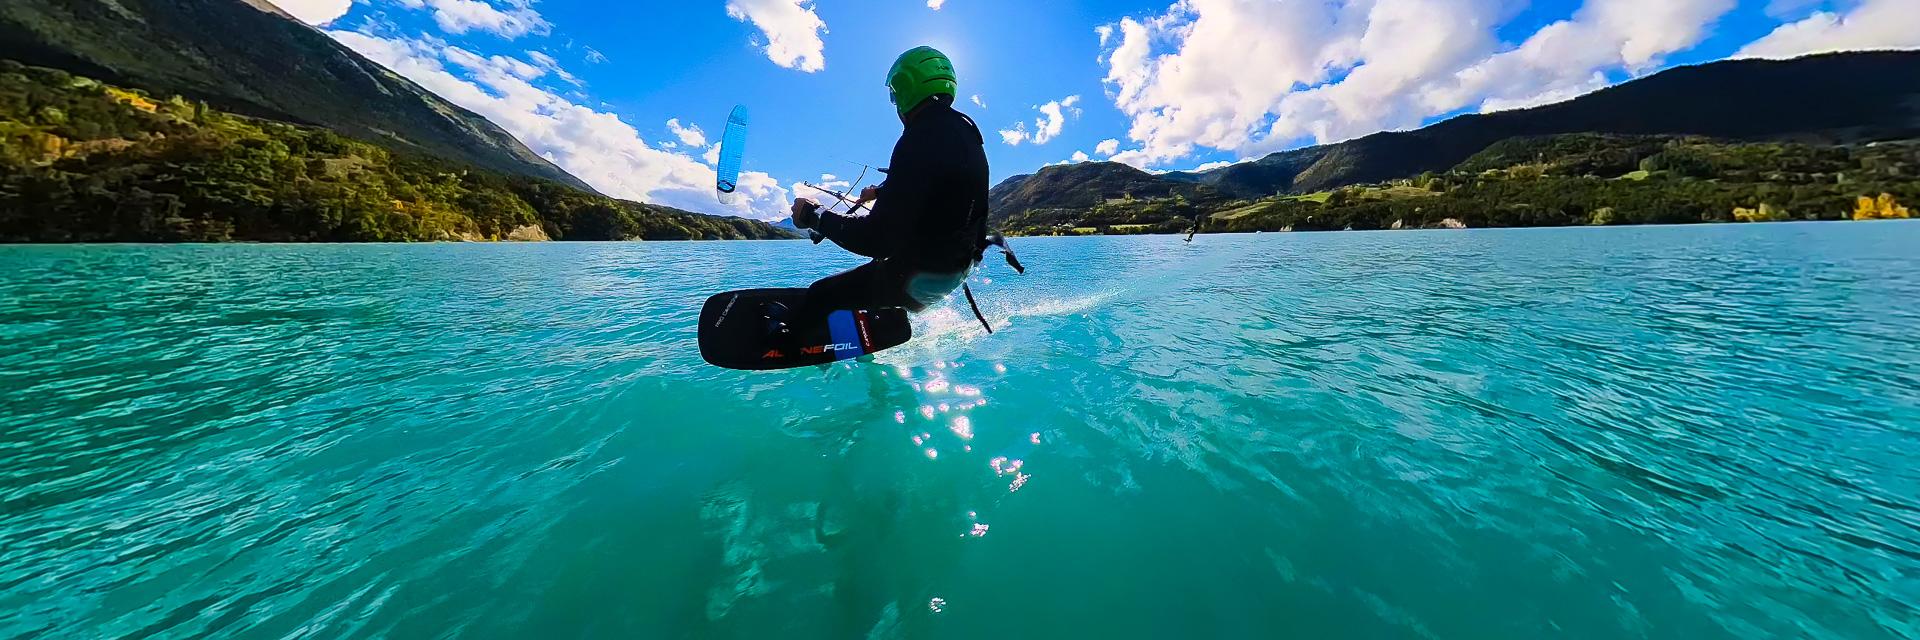
Pumpfoil tutorial for beginners: learn pumping with the drop start method, easier than the dock start. Ground drills, foil setup and mistakes to avoid: the method that got me flying on my very first day, at 53.
Learning to pumpfoil isn't easy. And it's even harder once you're past 40. I started pumpfoiling at 53. It wasn't easy, but I studied the subject closely to learn pumping as fast as possible. Here is my complete pumpfoil tutorial for beginners: the drop start method, simpler than the classic dock start, with the drills, the settings and the mistakes to avoid.
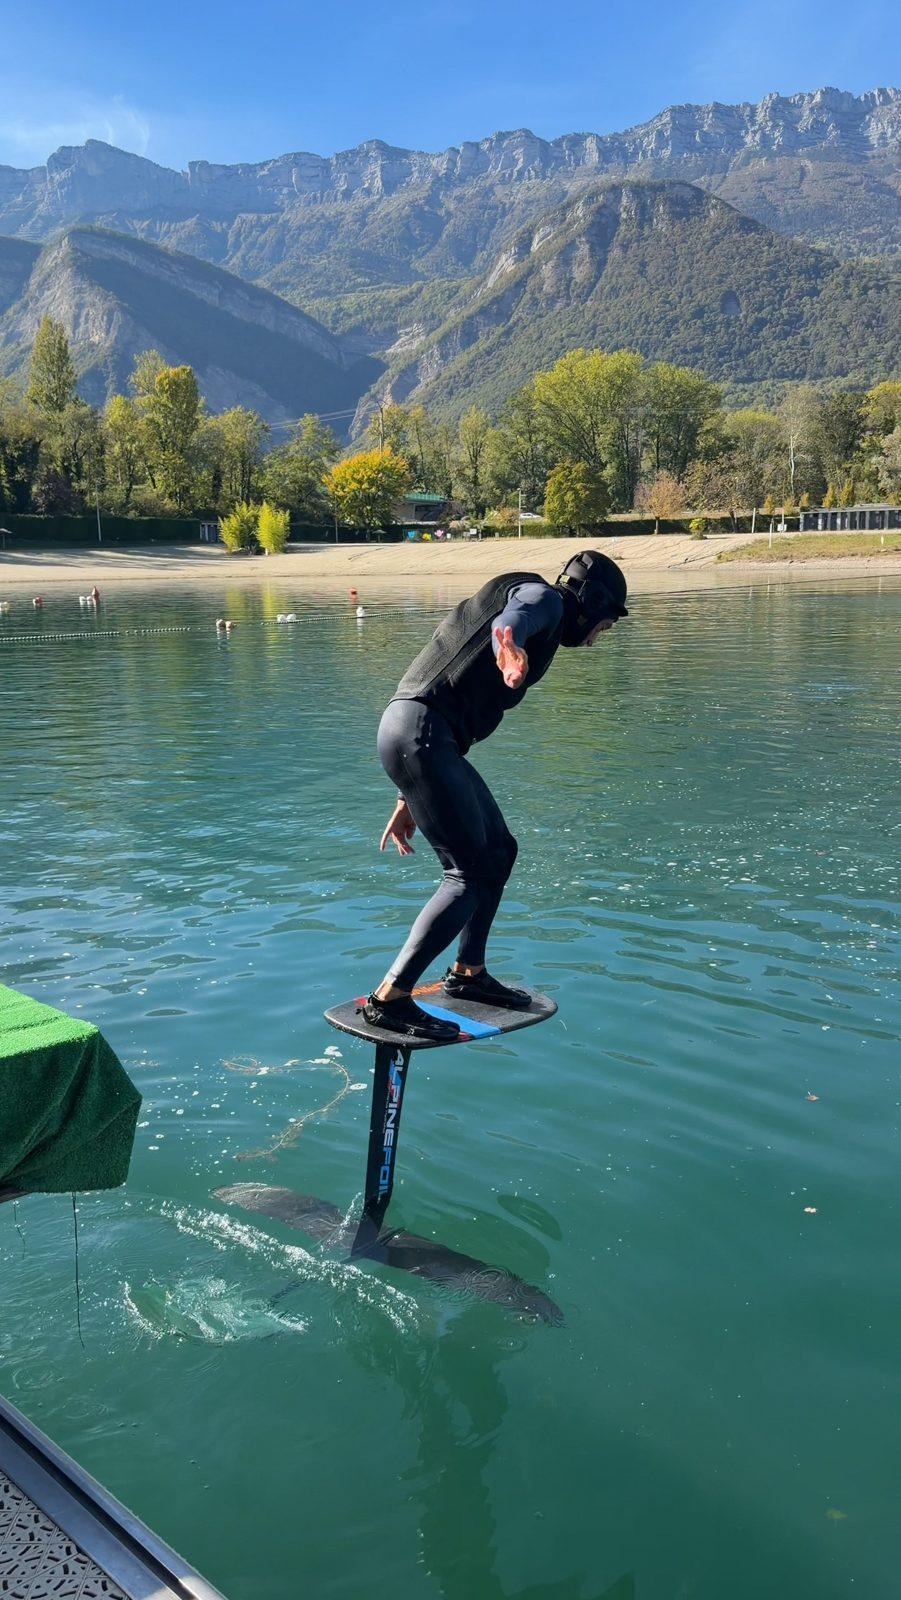
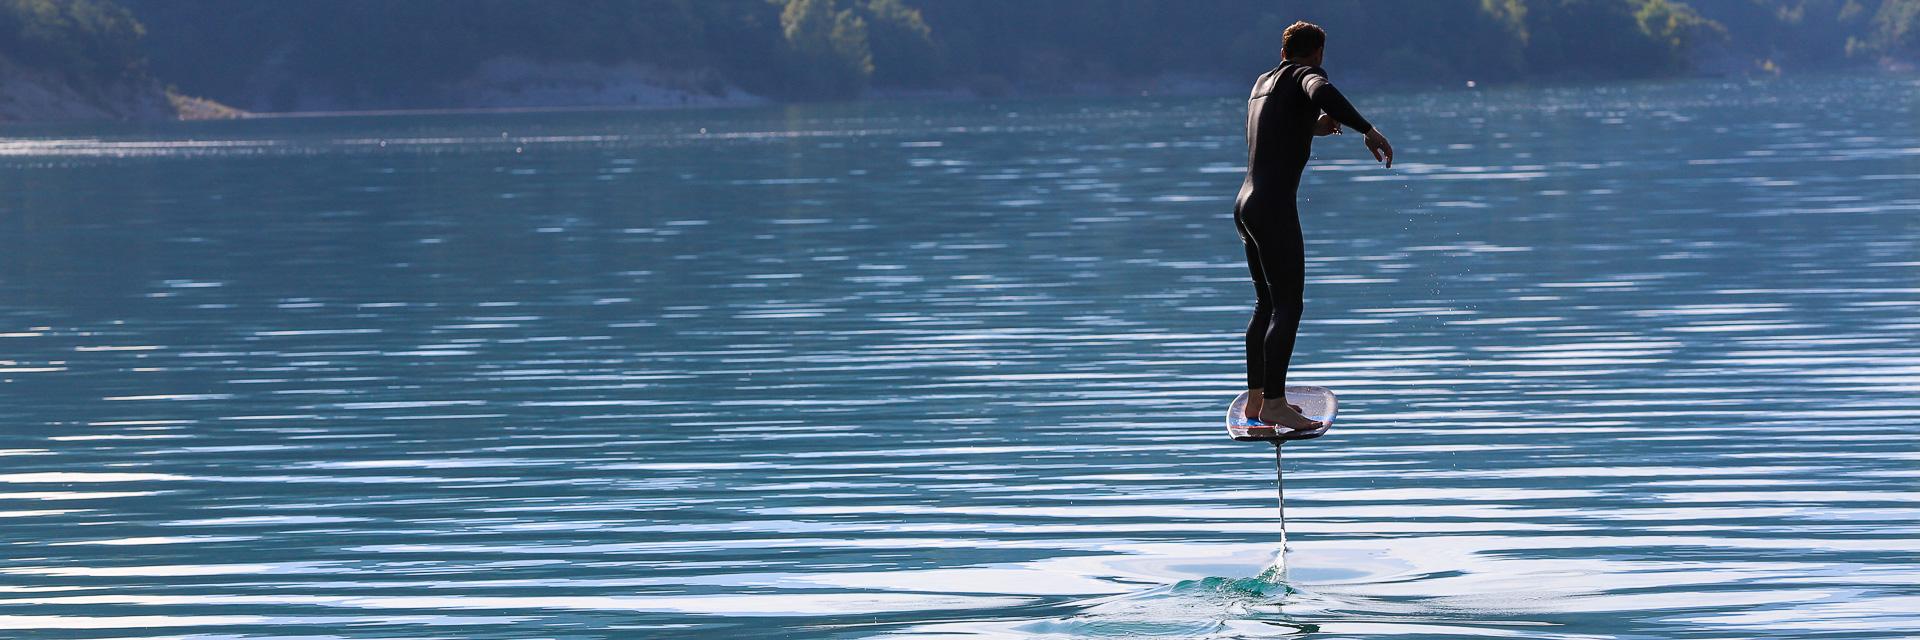
Flying after a drop start: knees bent, weight forward, eyes ahead and arms out for balance.
Drop start or dock start: which technique to start pumpfoiling?
There are many ways to learn pumpfoiling. One of the simplest for beginners is the drop start.
The dock start (dockstart) means running along a dock. That run makes foot placement imprecise and getting onto the board difficult. Especially at our age, when syncing your footwork is anything but obvious.
The drop start needs no run-up. You simply start from a small height above the water: a box on a flat dock, for example, about 50 cm above the water. The idea: you jump with a quarter turn and use the energy from the height to glide. Then you can start pumping.
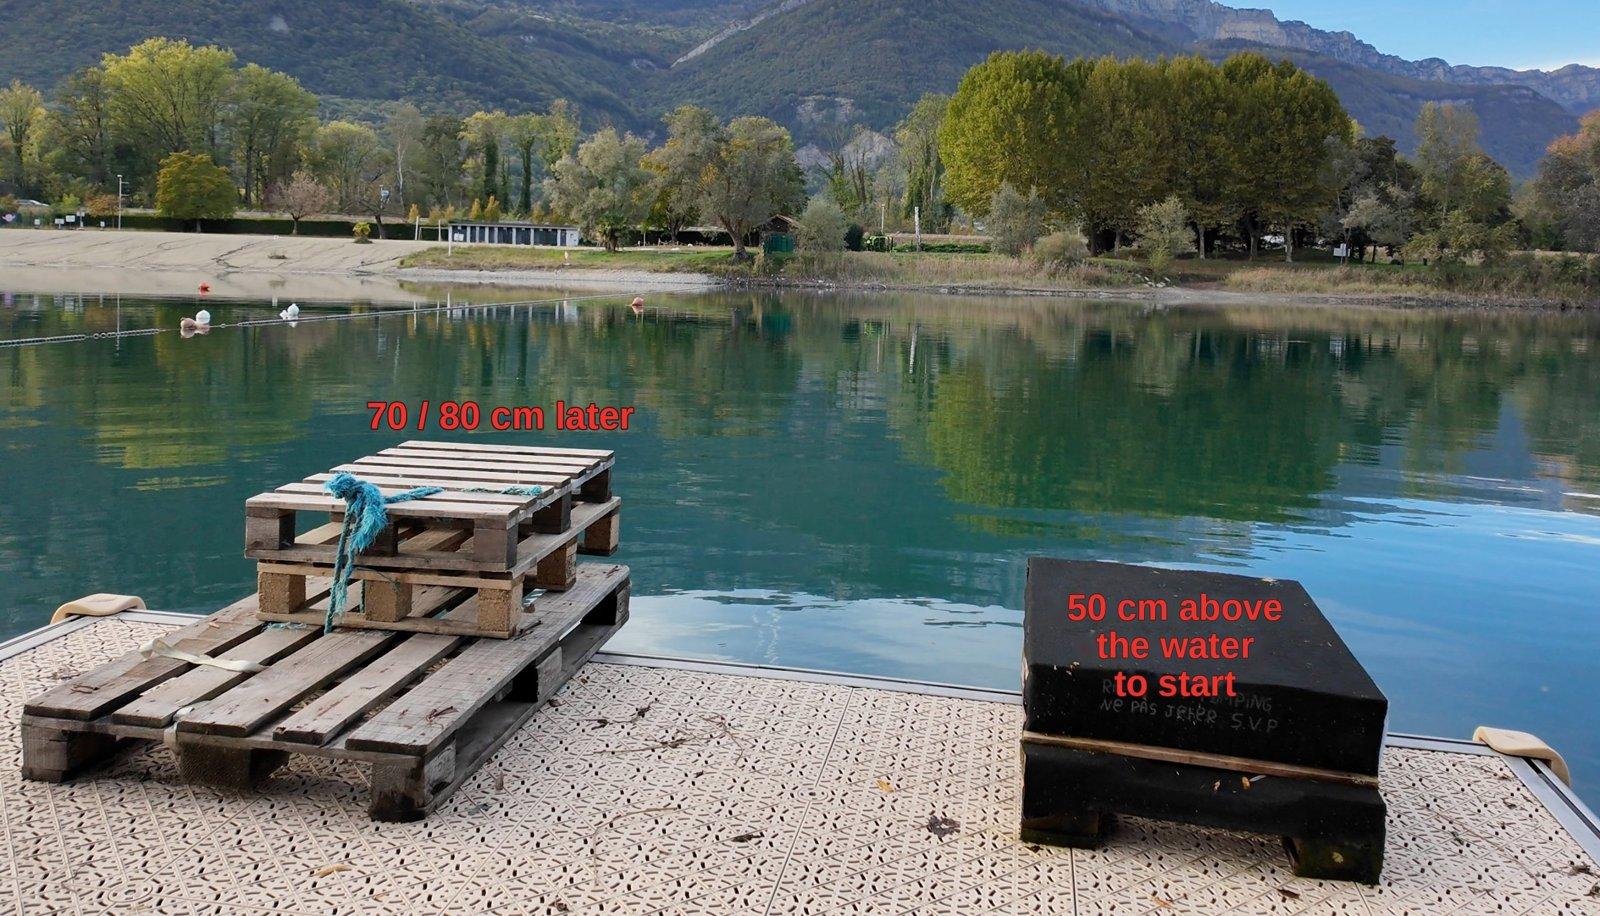
On the right, the box 50 cm above the water to start with. On the left, the pallets at 70-80 cm for later.
Why start with parallel feet?
I deliberately chose the parallel-feet start rather than the back-foot start. The back-foot start puts much more energy into the foil, which is very useful with small wings.
But with a wing designed for the drop start, you don't need that energy. In fact it's a handicap: the 180° rotation makes foot placement approximate and leads to many more failed jumps. A 90° rotation keeps everything simple.
Understanding pumping: a bit of theory before hitting the water
This part gives you a simple picture of how pumping works. It's very important and will save you a lot of time.
- The back leg provides the power.
- The front leg controls the pitch, meaning the climb and the descent.
As a beginner, at first, put roughly 80% of the effort on the back leg and 20% on the front leg. An experienced rider ends up closer to 55% back and 45% front.
Pushing on the back leg creates a reaction that makes the foil rise. With the front leg, you control that climb to stay as flat as possible. If you climb too steeply, the foil slows down, then stops.
At the top of the curve, you have to control the descent. If you push too hard, you drop too steeply and lose everything you just gained. So there is always a slight offset between the front and back actions.
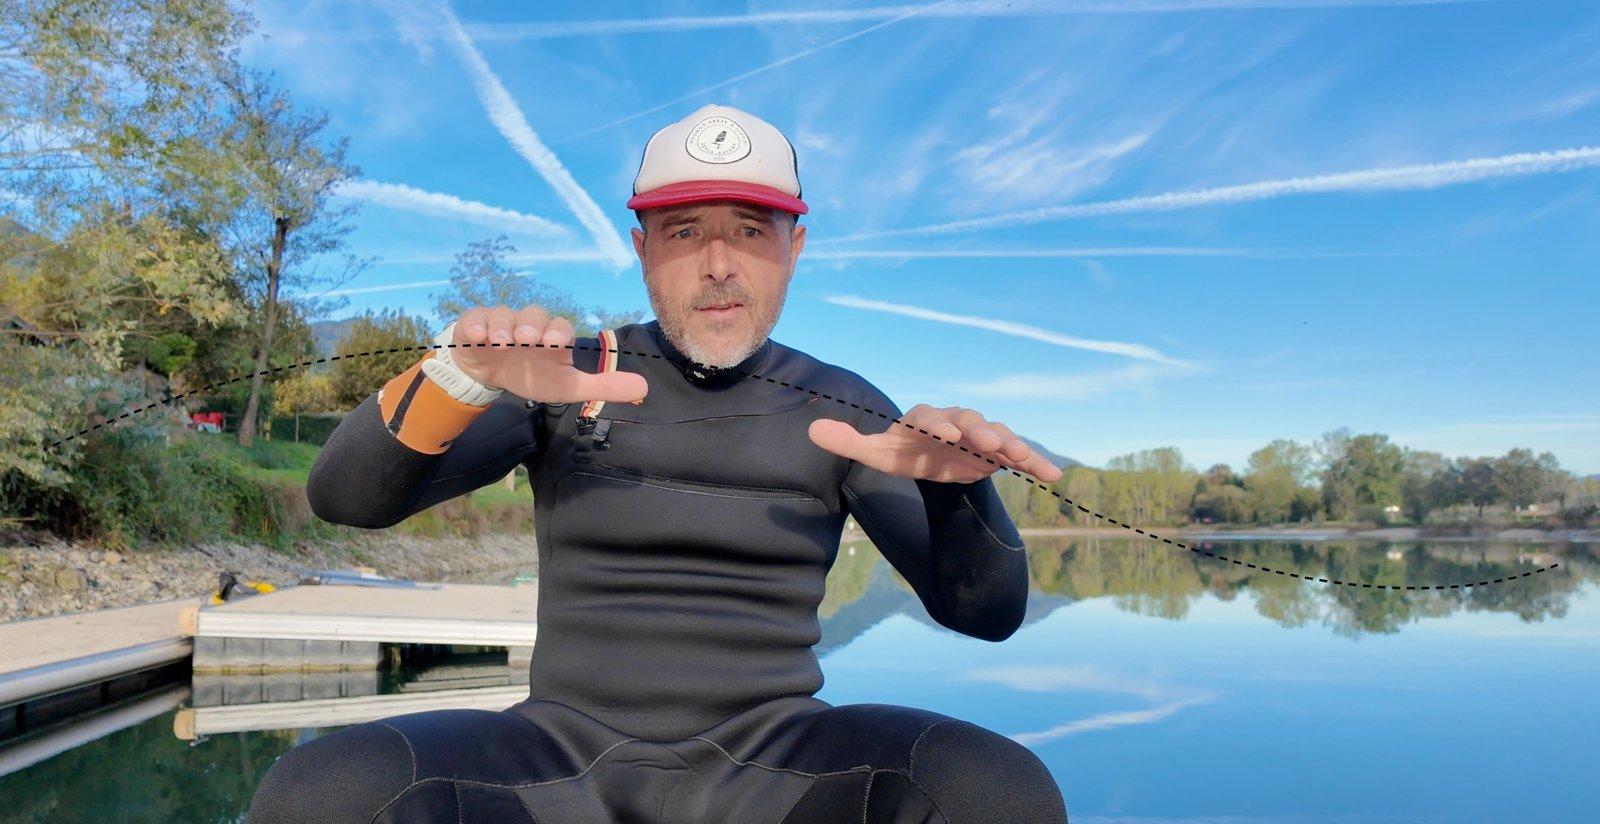
The foil's path: a smooth curve going up and down. Control the climb, then the descent, never going vertical.
Step 1: practise on dry land first
Before you start jumping into the water, where you waste a lot of time, practise on the ground.
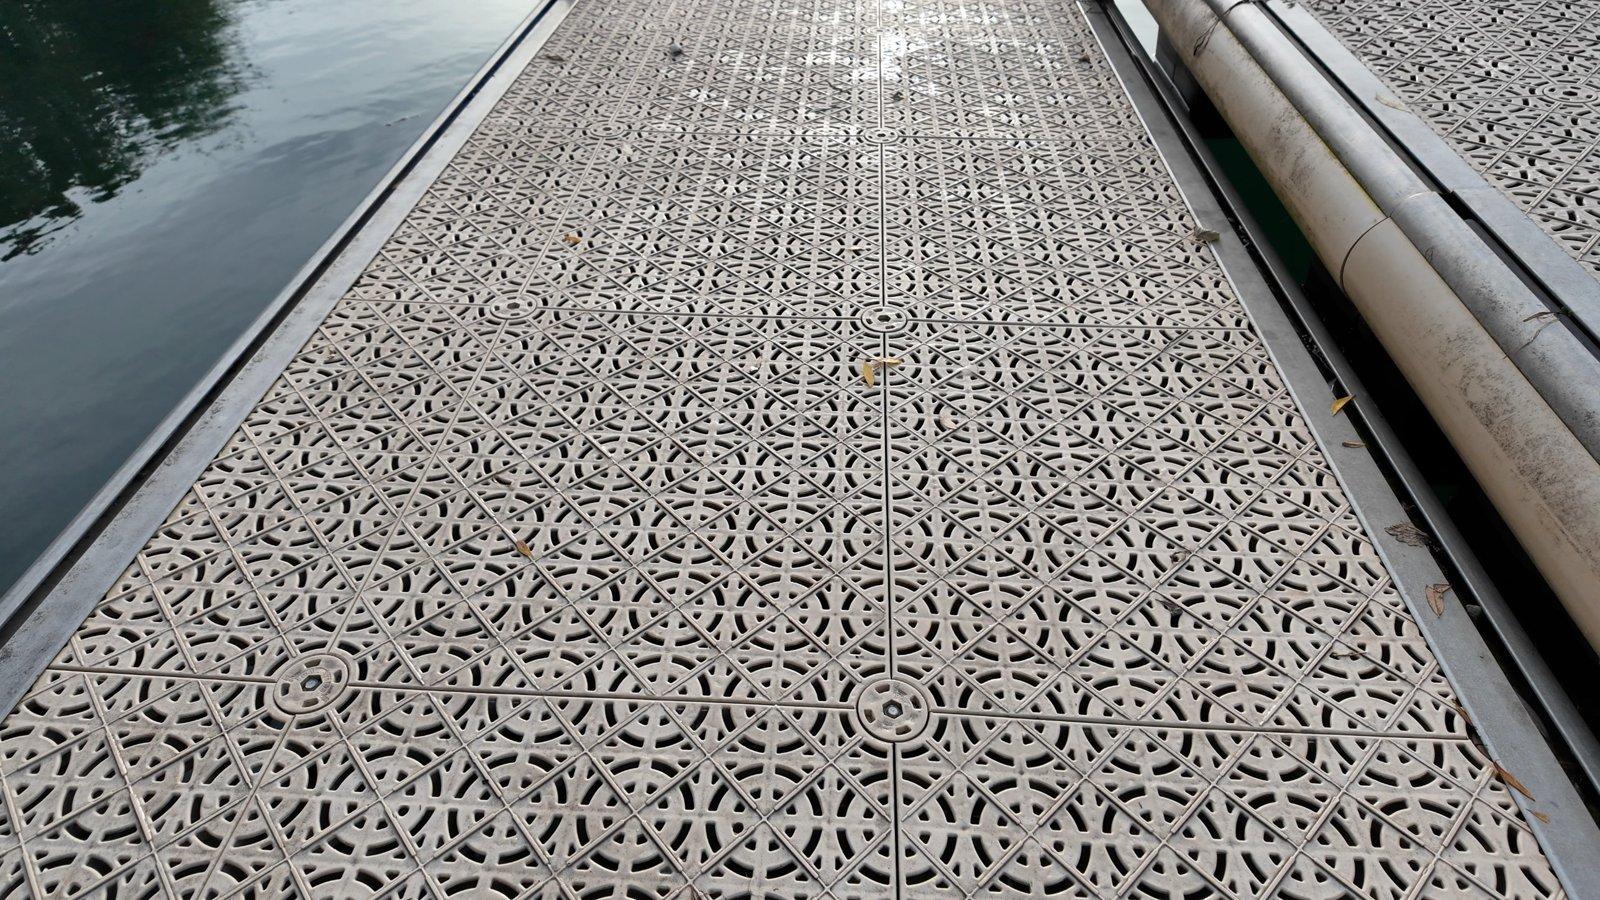
A flat dock makes a great practice area: the lines between the tiles act as markers.
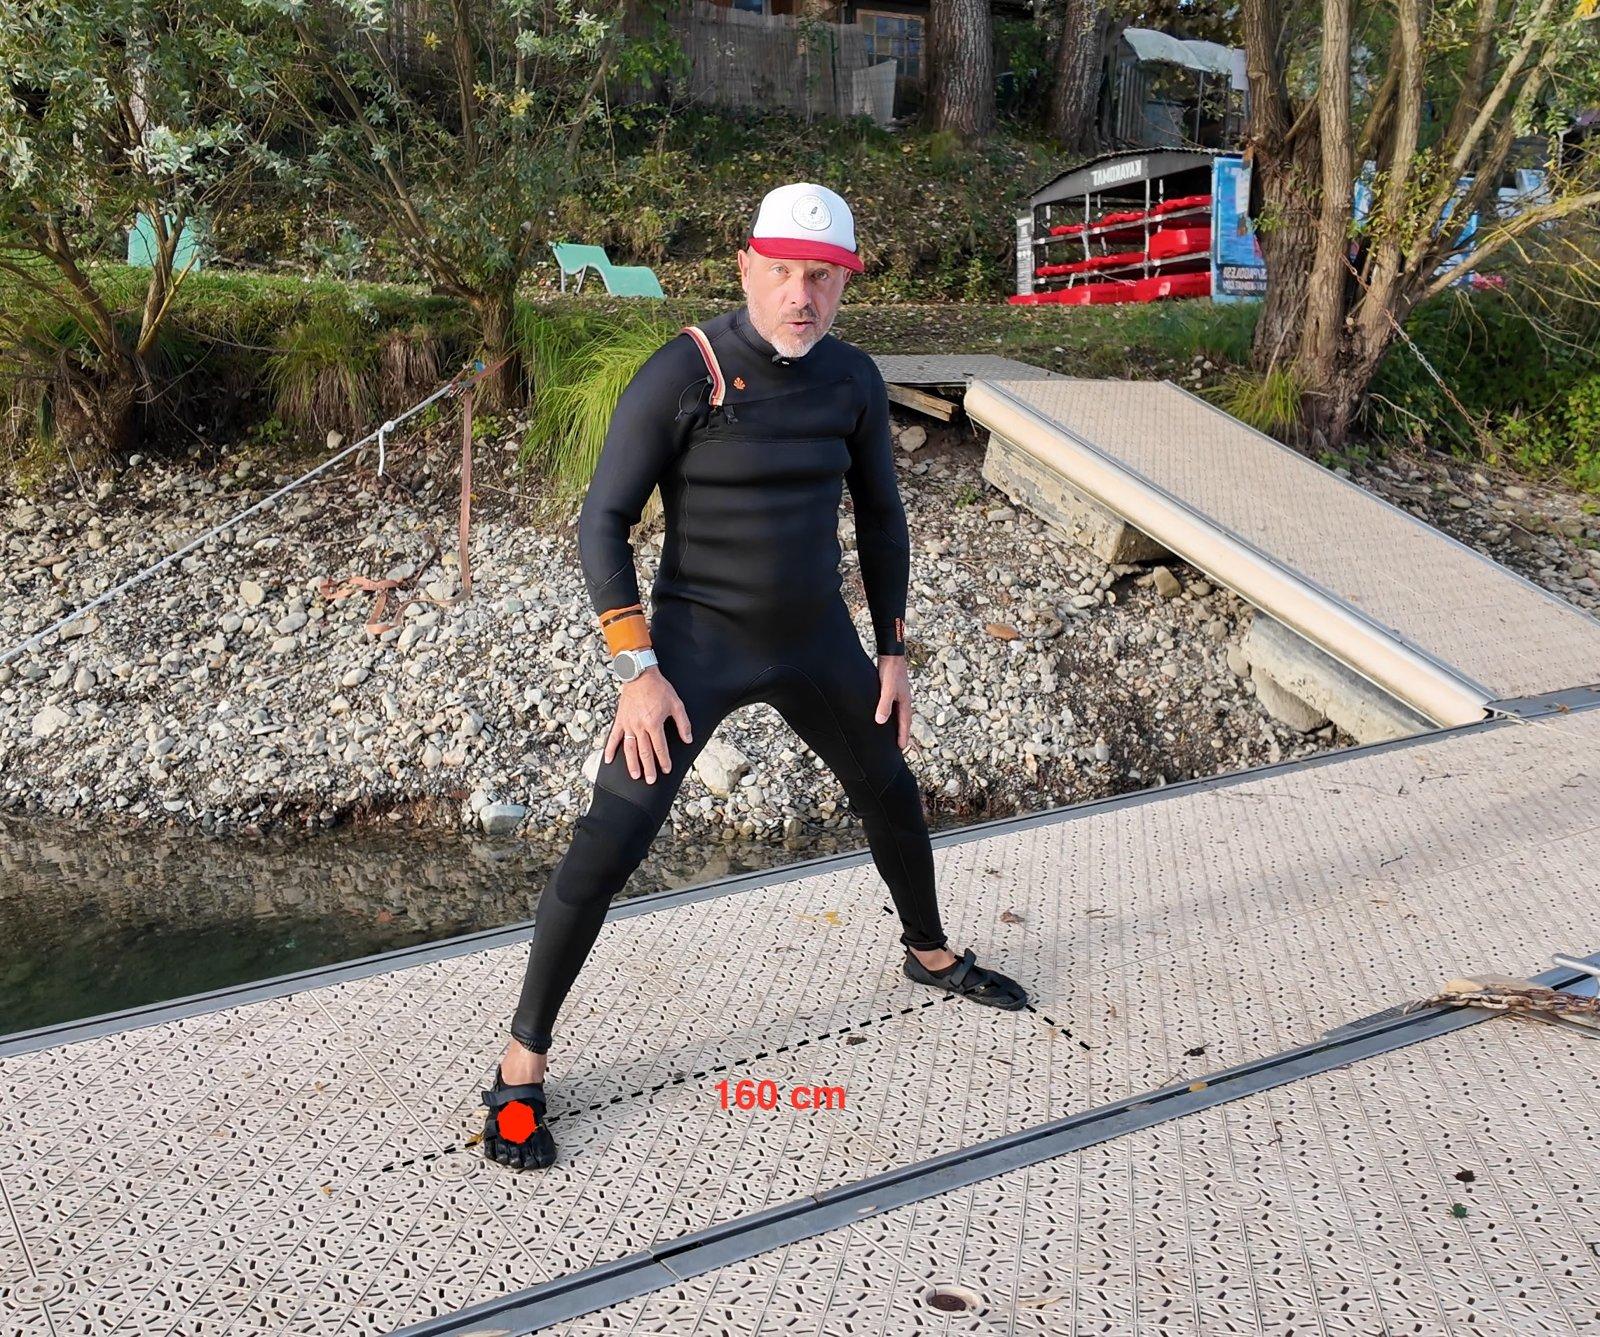
To picture the distance: this is what 1.60 m between the edge and the front foot looks like. It's where to place your front foot during practice.
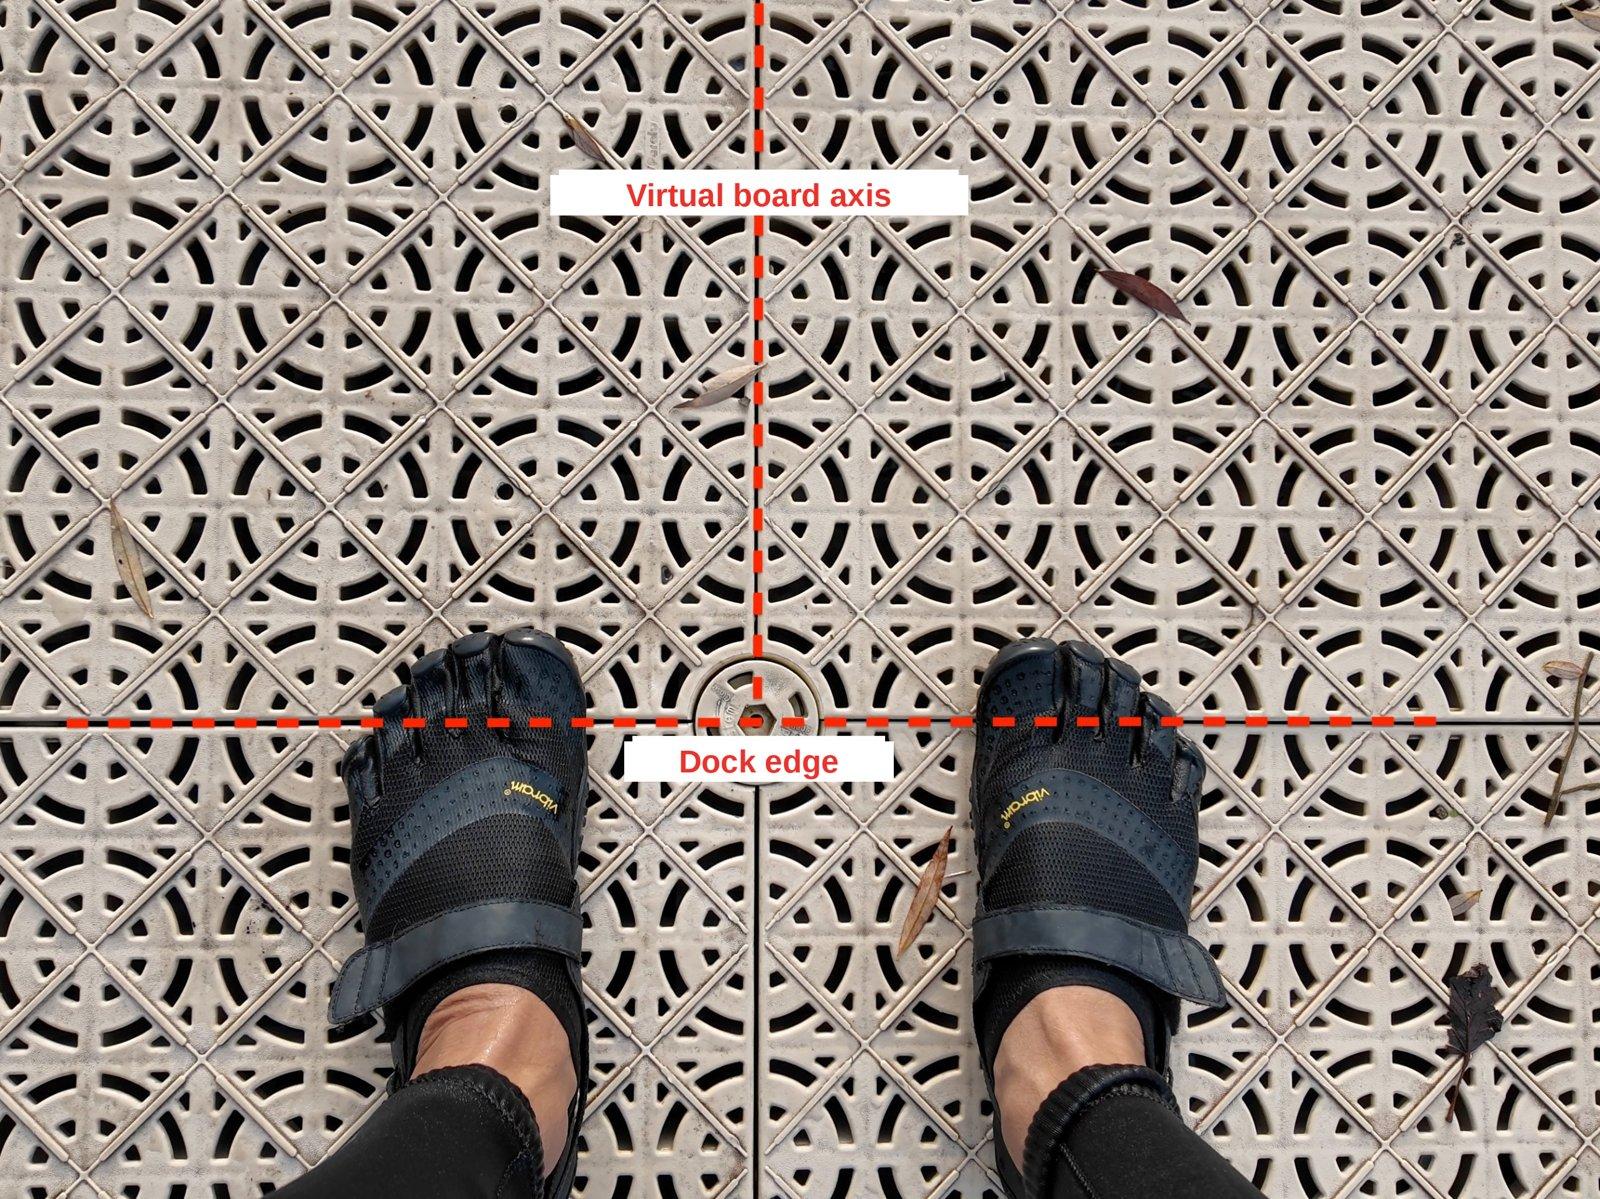
One line of tiles is the dock edge, the perpendicular line is the board axis. Feet are parallel, either side of the axis.
- Imagine the edge of a dock. Stand with your feet parallel, about 30 cm apart.
- Place a marker about 1.60 m in front of you: that's where your front foot must land.
- Jump both forward (about 1.60 m) and up (about 50 cm). You need both, otherwise you won't land in the right place.
- During the jump, make a 90° rotation.
- Land with both feet at the same time, body forward, eyes looking where you're going, not at your feet.
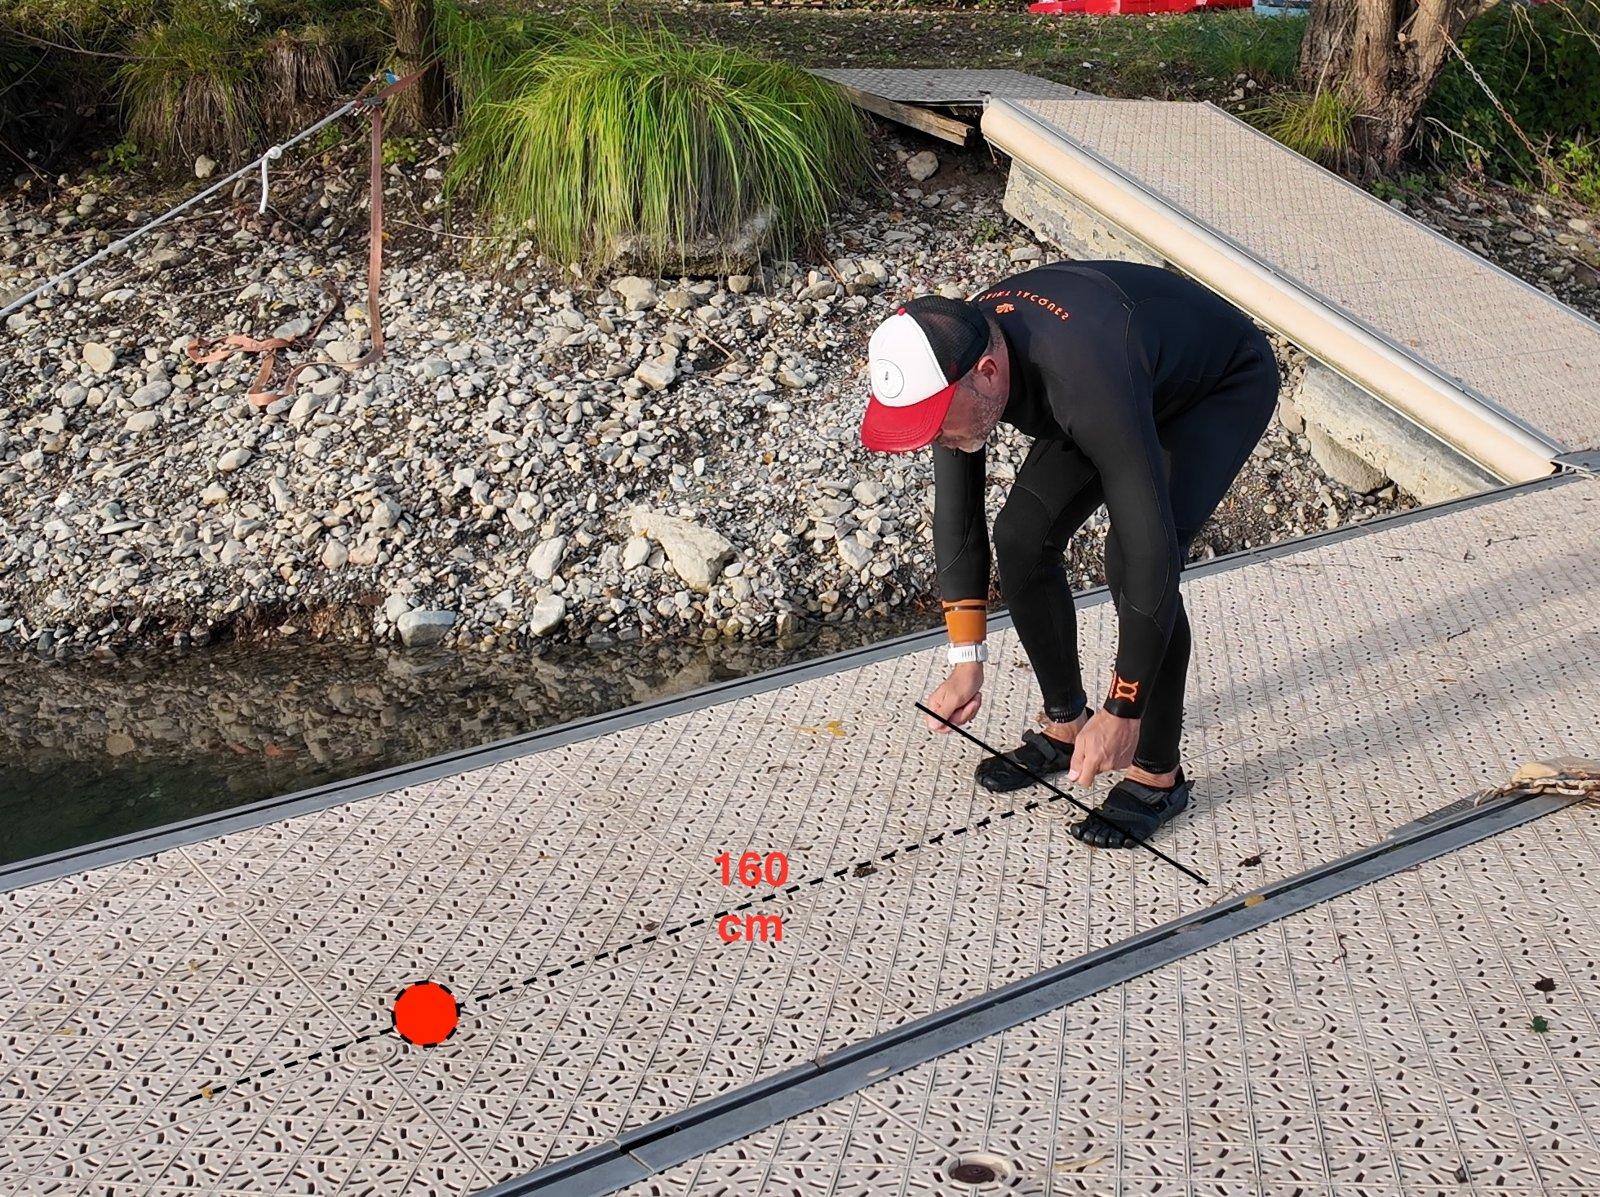
Step 2: measure 1.60 m from the edge and place a marker (red dot) where the front foot must land.
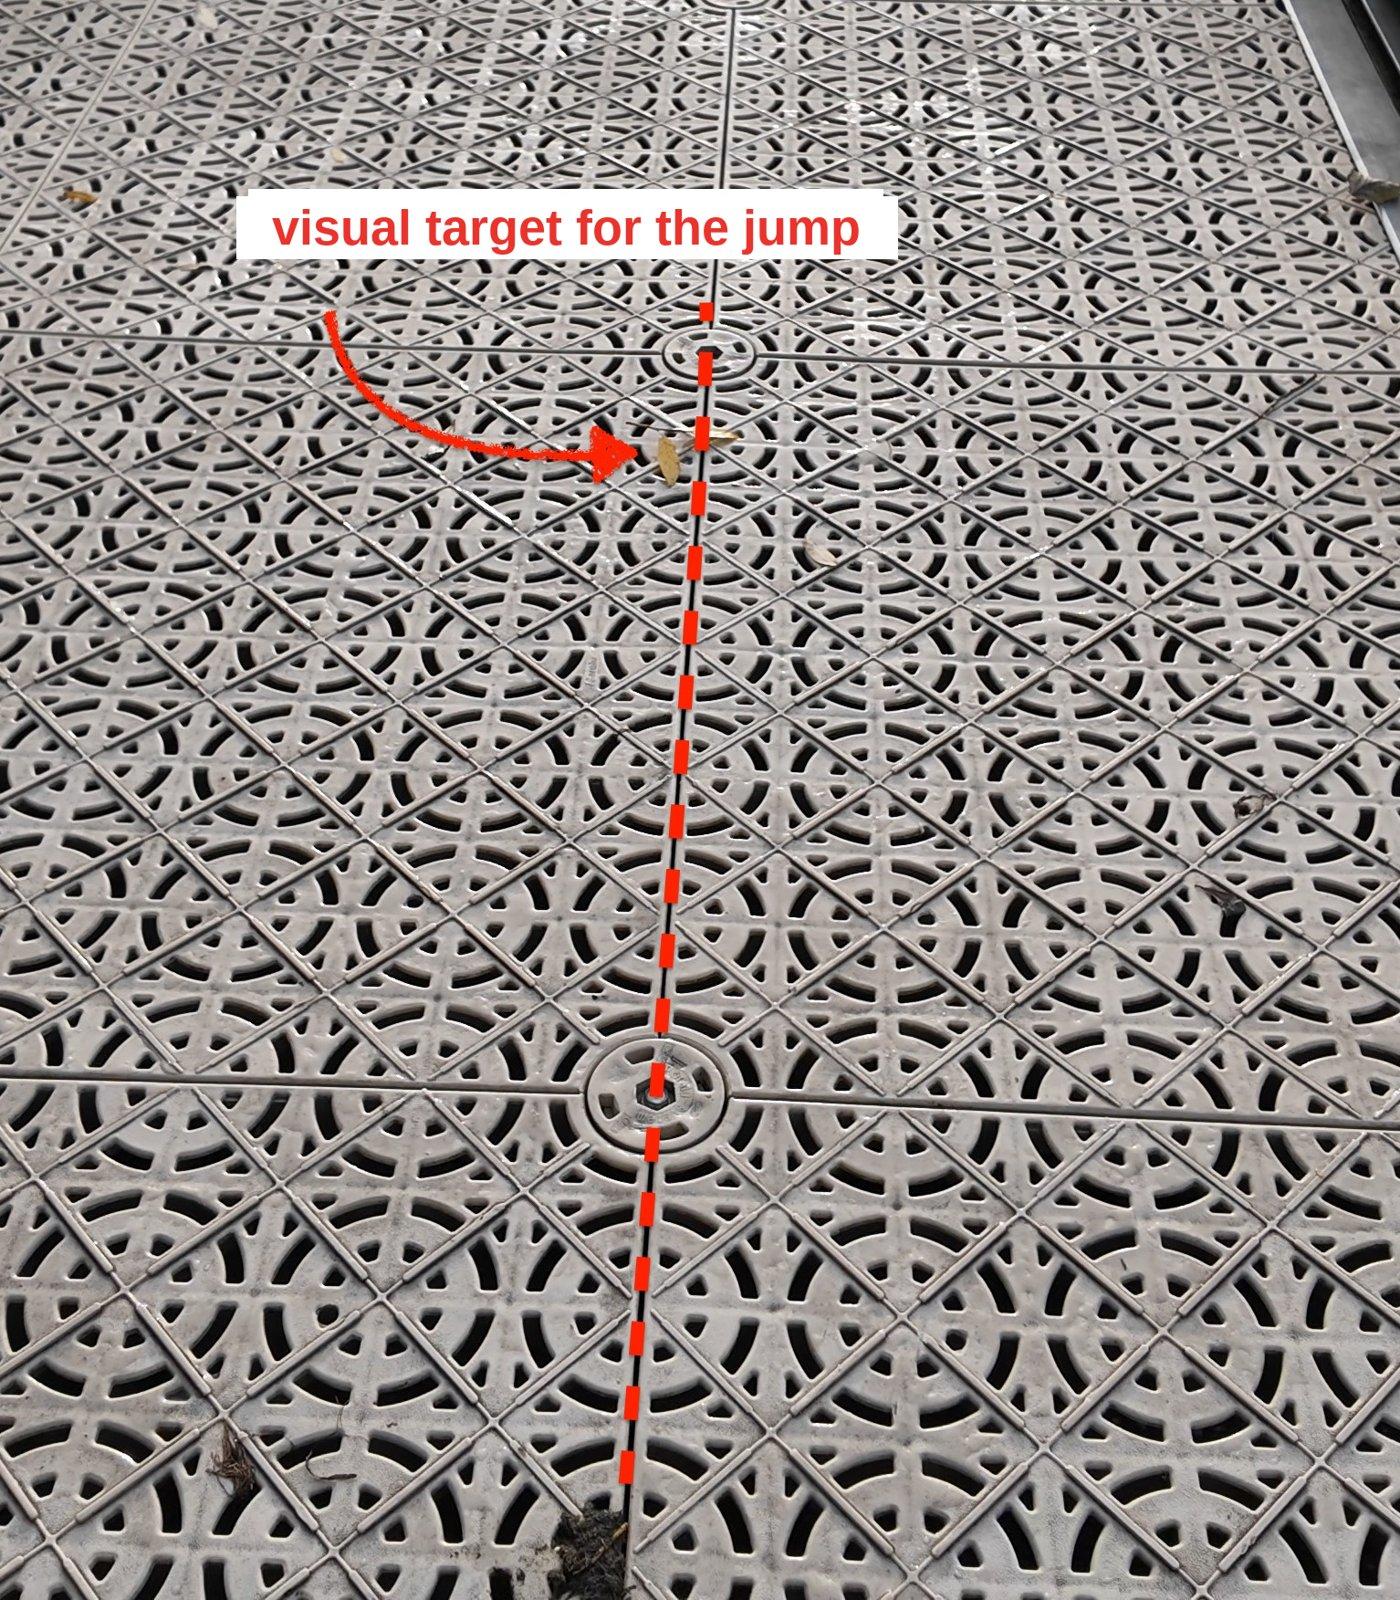
A simple joint between tiles makes a great visual target for the jump.
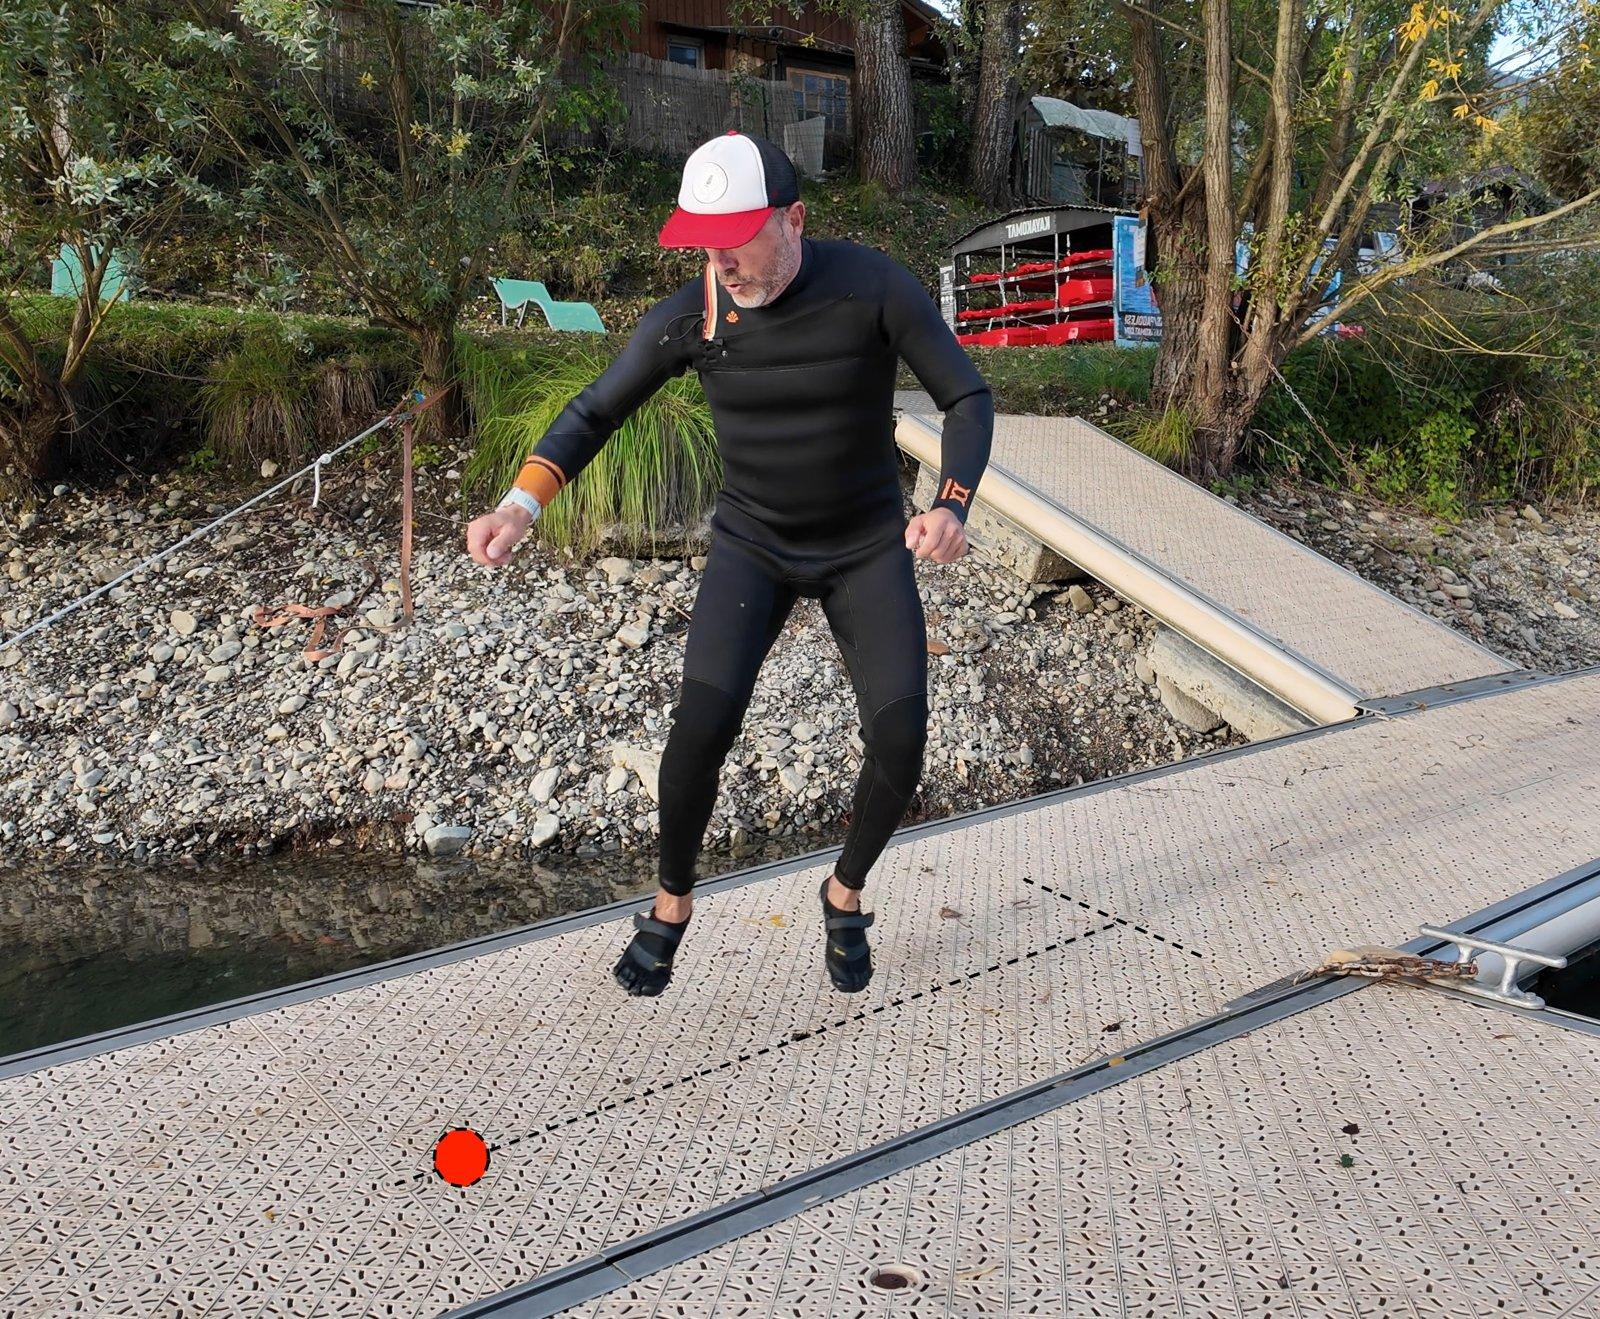
Steps 3 and 4: jump up and forward, and start the quarter turn while aiming at the marker.
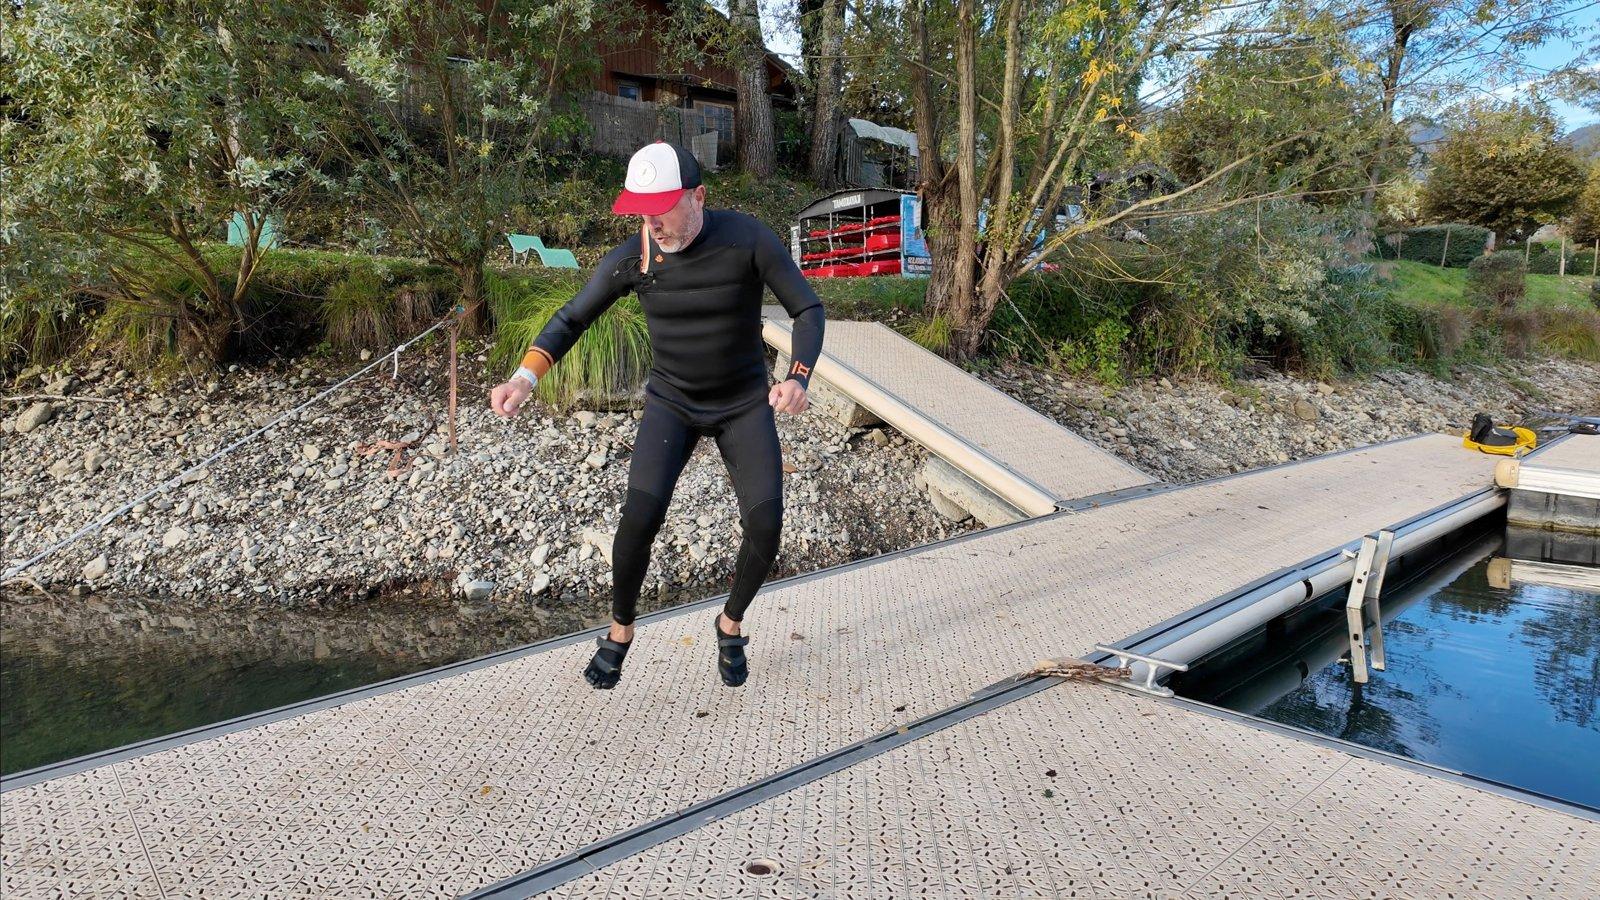
The same jump from the front: both feet leave the ground together, arms follow the rotation.
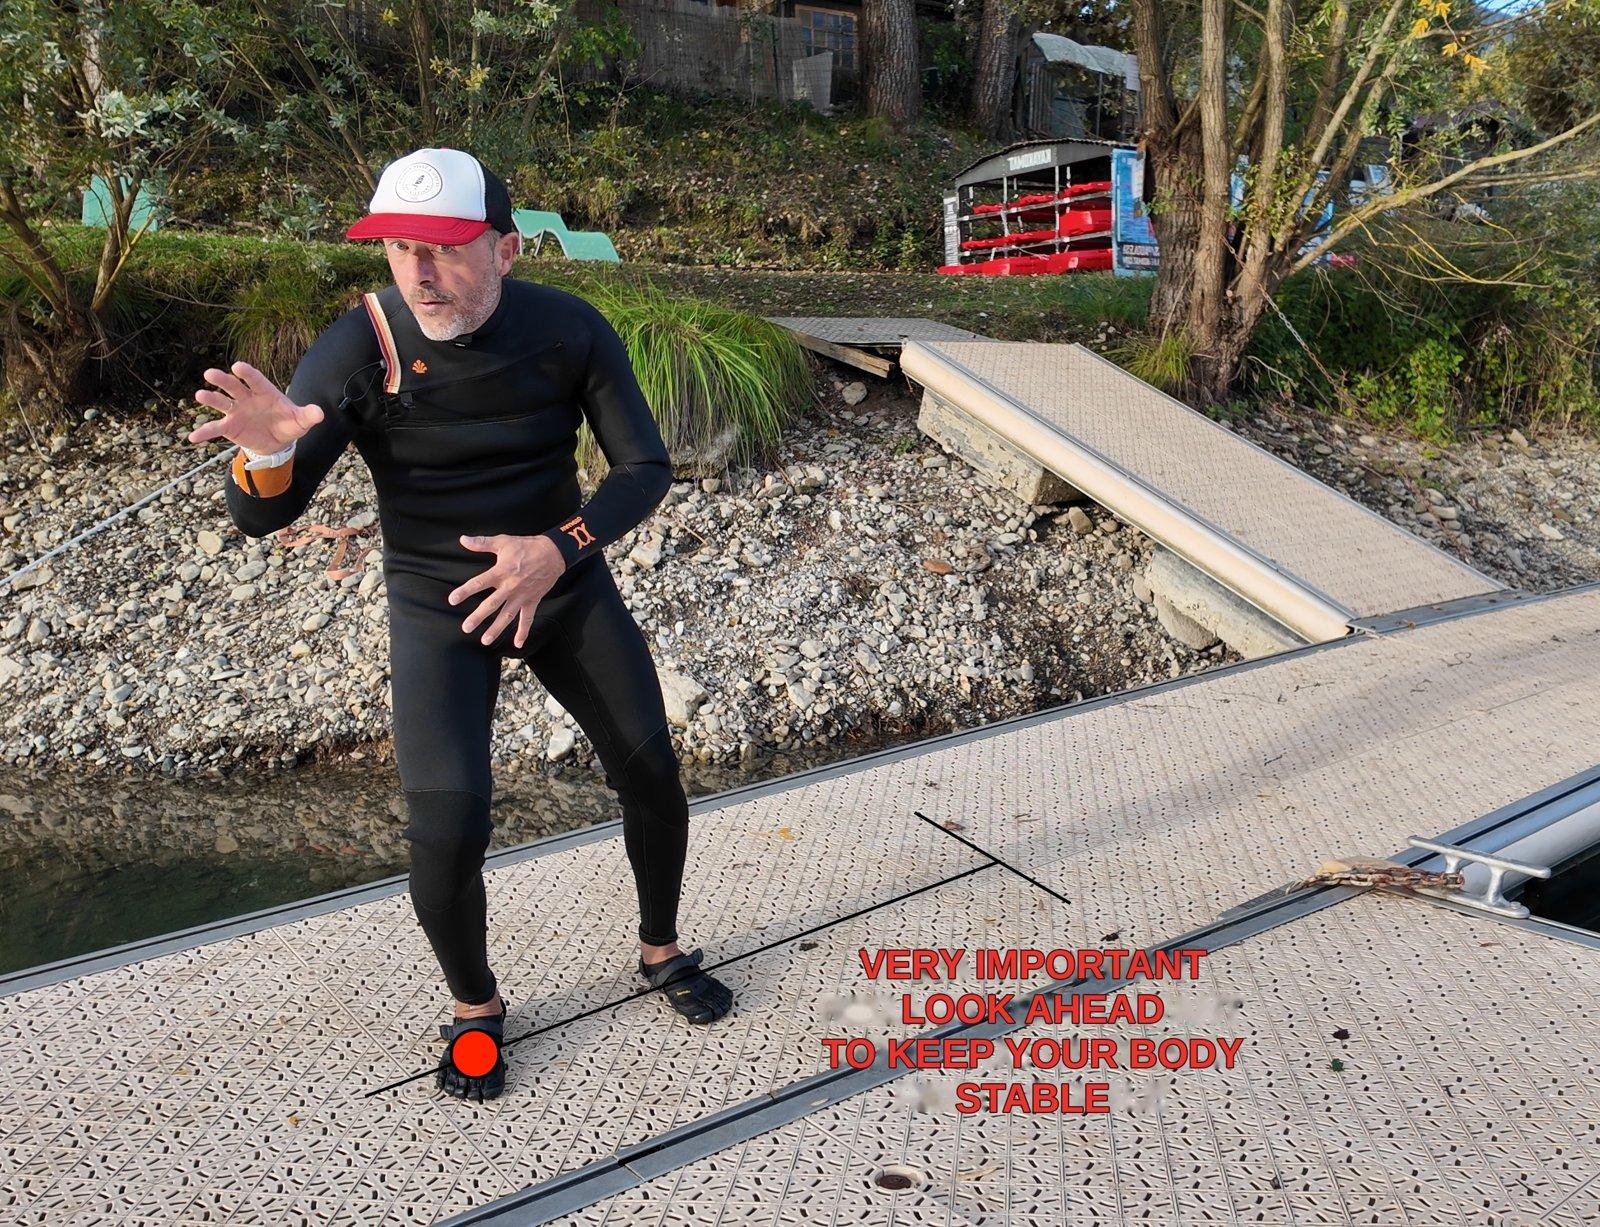
Very important: look ahead to keep your body stable.
Repeat this move as many times as needed until you feel comfortable.
Aim for the cross on the board
Alpinefoil pumpfoil boards, including the Pocket Pro carbon 88 and the Pocket Pro carbon 78, have small crosses on the deck. They act as a sight: look at them just before and during the jump, and your front foot will land right on them.
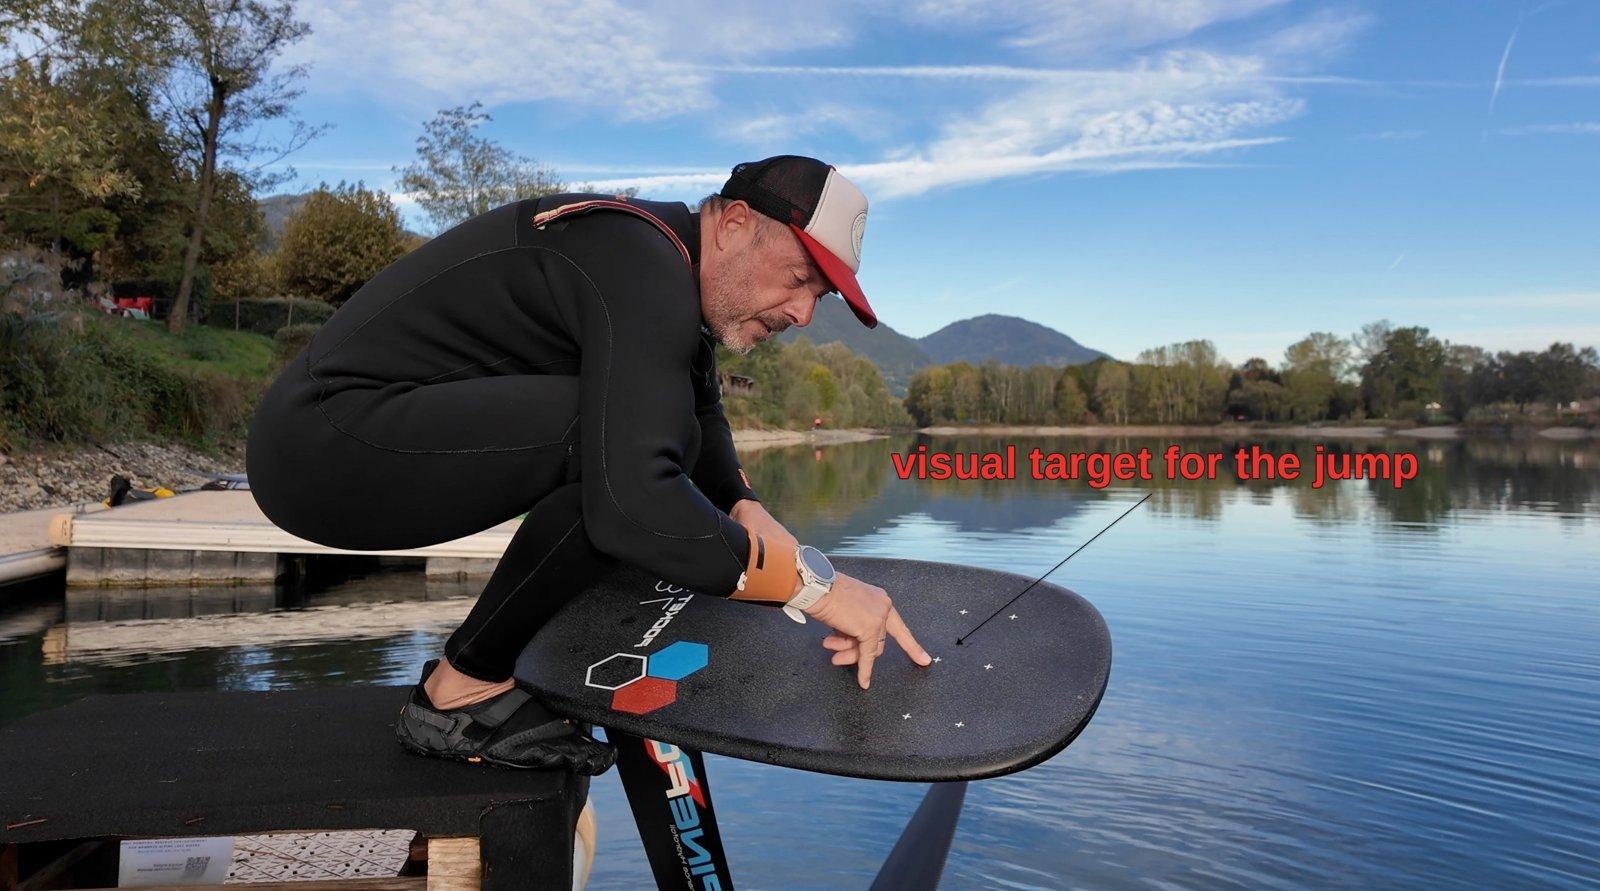
The small crosses on the board: your visual target for the jump.
Stance and body position
- Weight goes over the front leg, shoulders forward. If your body is upright or leaning back, the foil jumps up and you fall backwards.
- Keep a narrow stance: a bit less than shoulder width. With your legs too wide, you lean back and the foil jumps up.
- On landing: legs slightly bent, feet firmly planted, placed on the board's centre line, lengthwise.
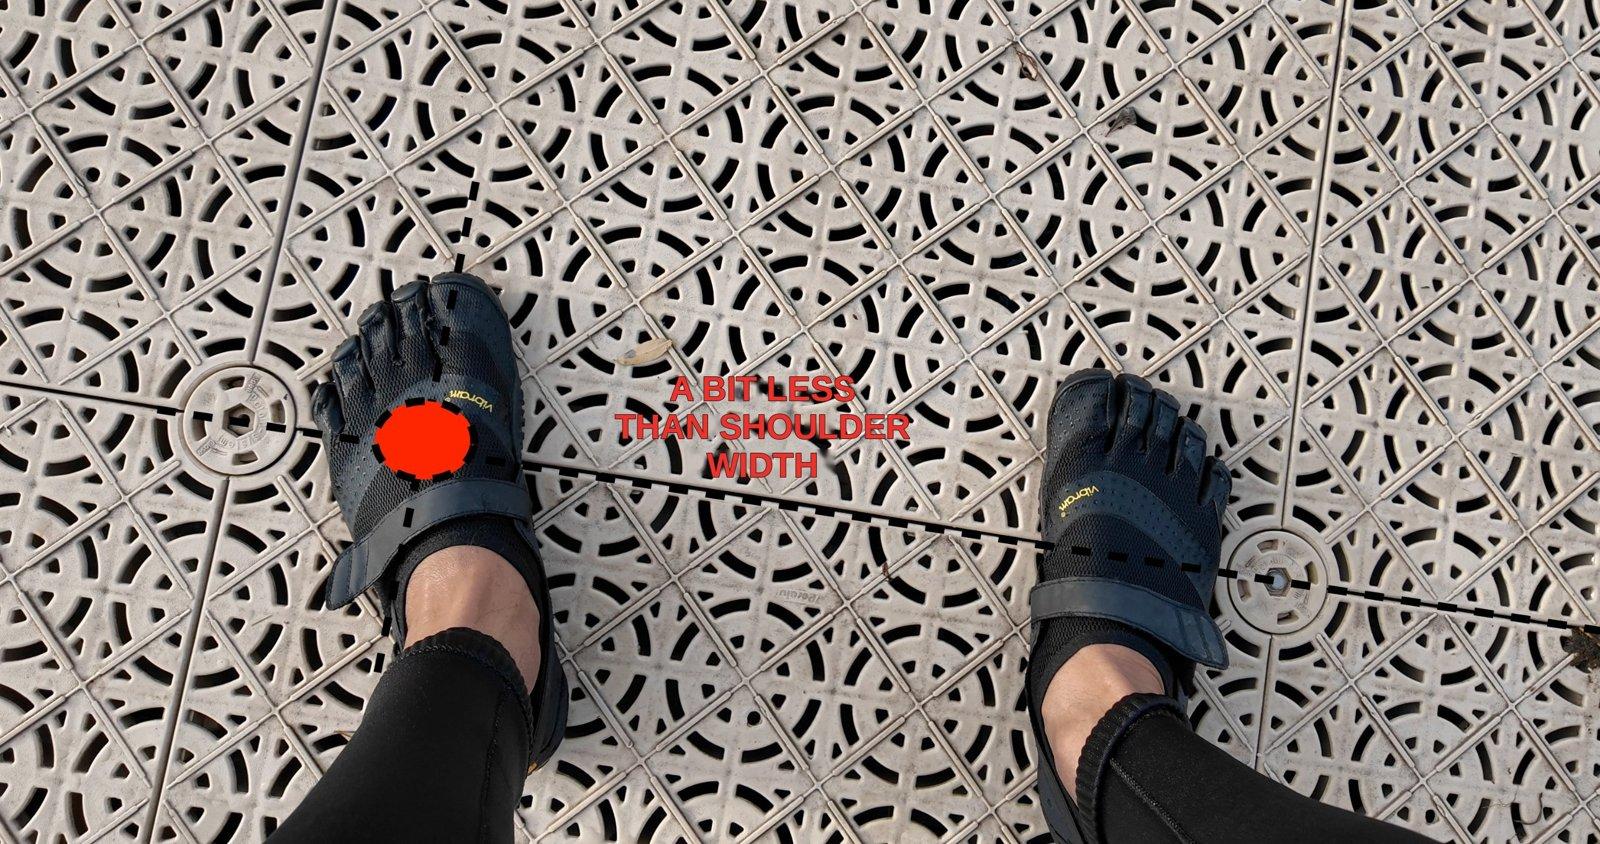
A narrow stance: feet a bit less than shoulder width apart, on the board's centre line.
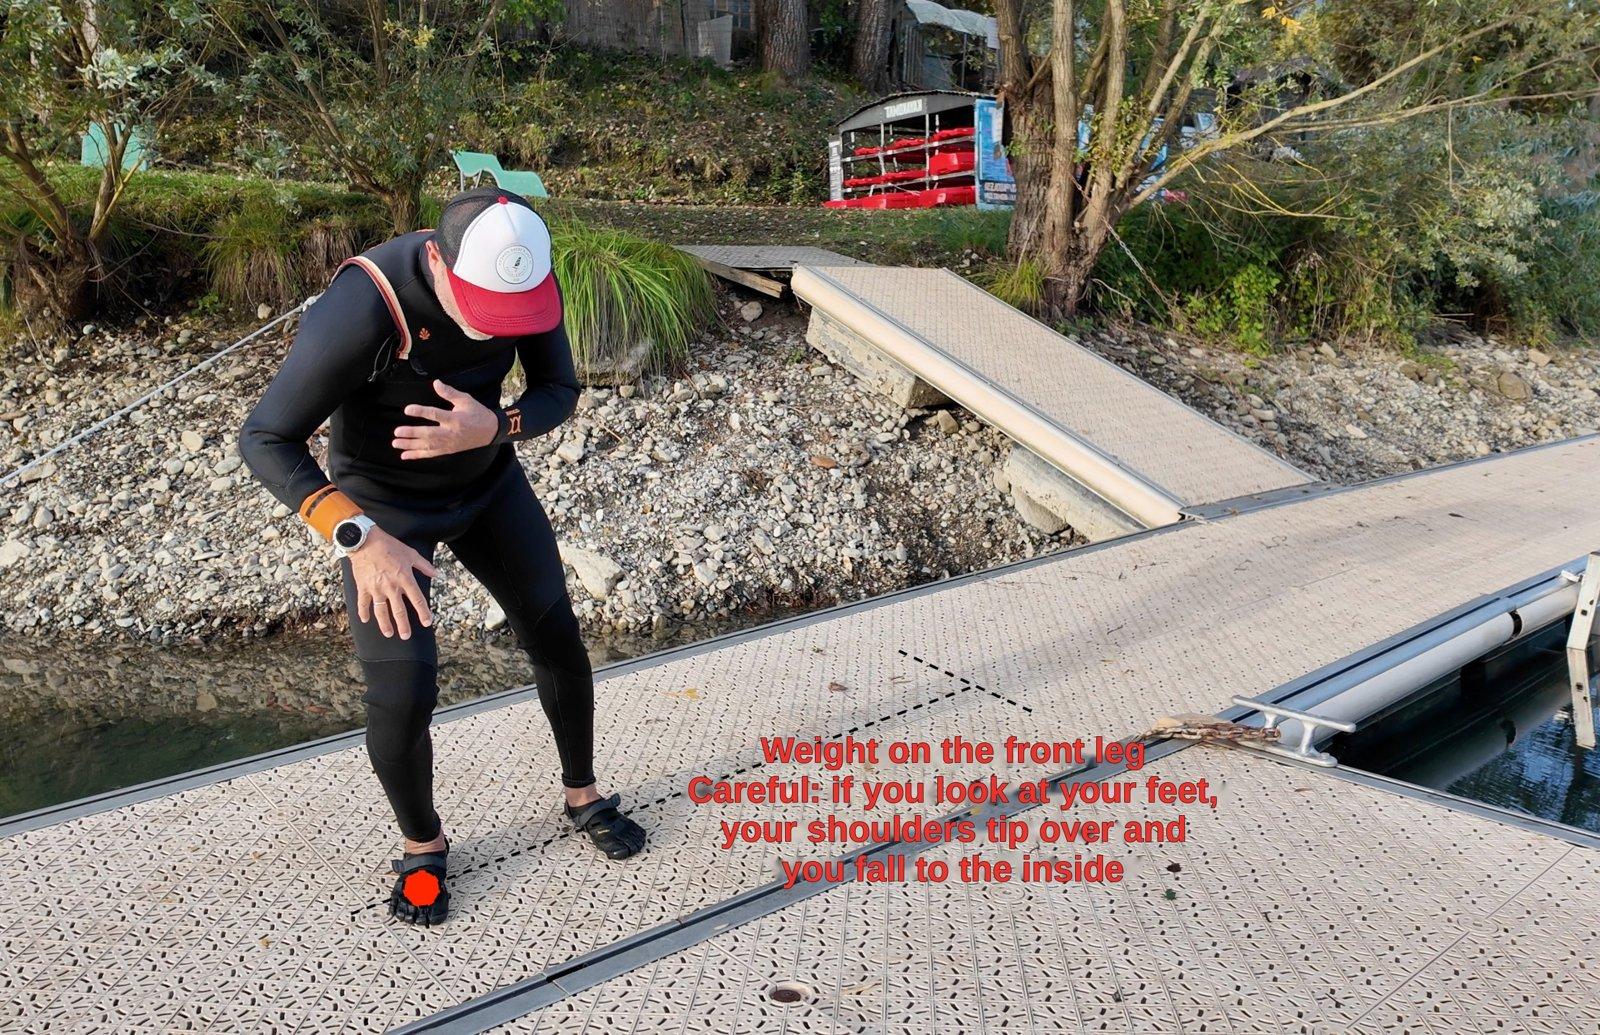
Weight on the front leg. Careful: if you look at your feet, your shoulders tip over and you fall to the inside.
Step 2: move to the dock for the drop start
Once you're comfortable on the ground, move to the dock, about 50 cm above the water.
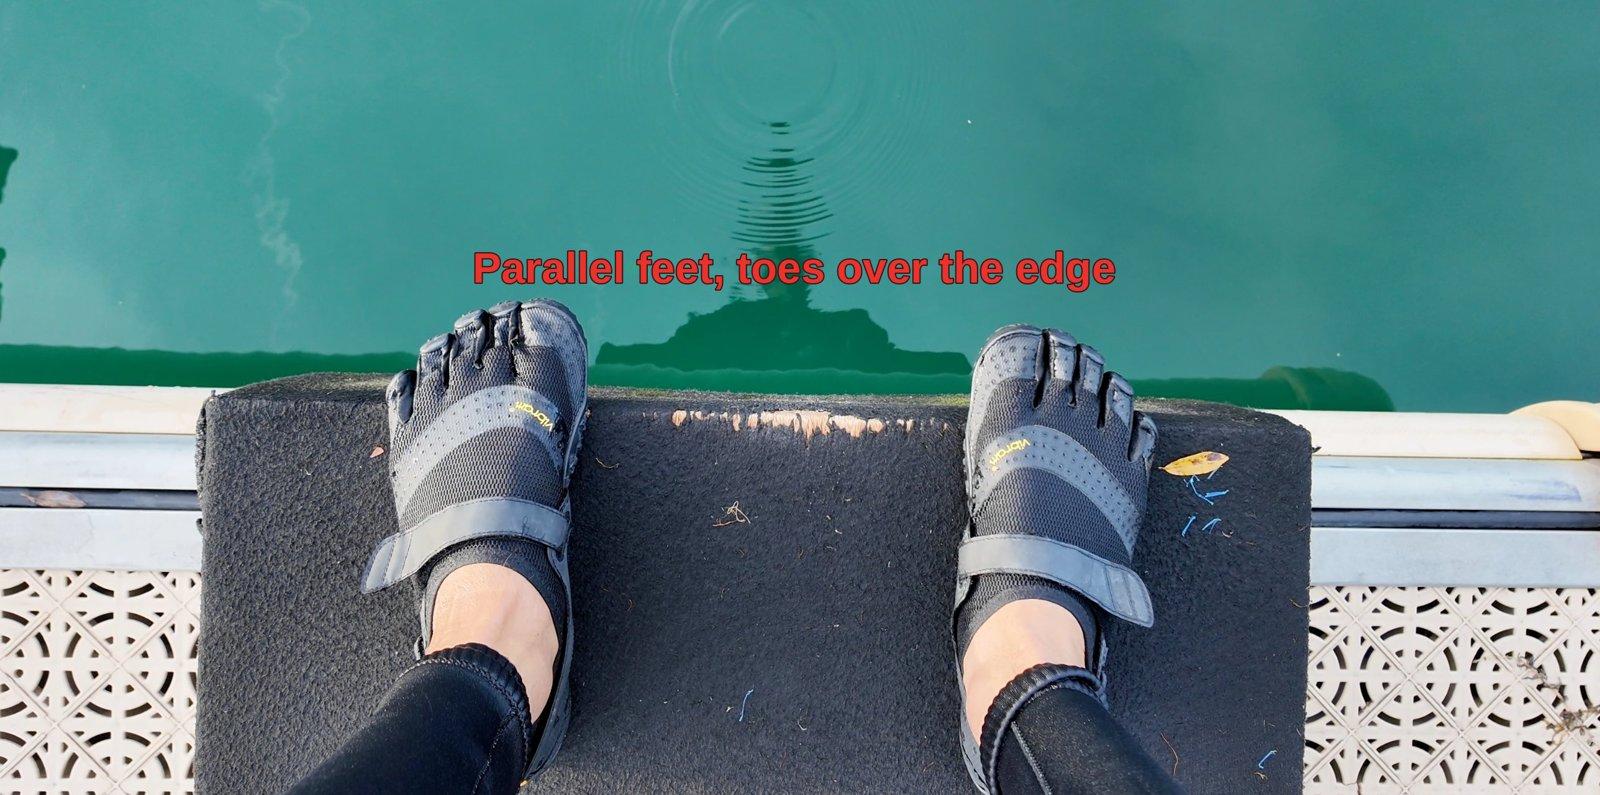
On the box: parallel feet, toes slightly over the edge.
Holding the board
- Hold the board at ankle level, never higher. If you hold it higher, you won't rise enough to move forward, you'll land on the back of the board and it won't work.
- At first, the wing and the stabiliser must be in the water, not out of it.
- Keep your hips up. If you crouch too low, by the time you stand up you won't have time to get in position, your body will stay back and you'll bounce.
- Hold the board firmly by the tail.
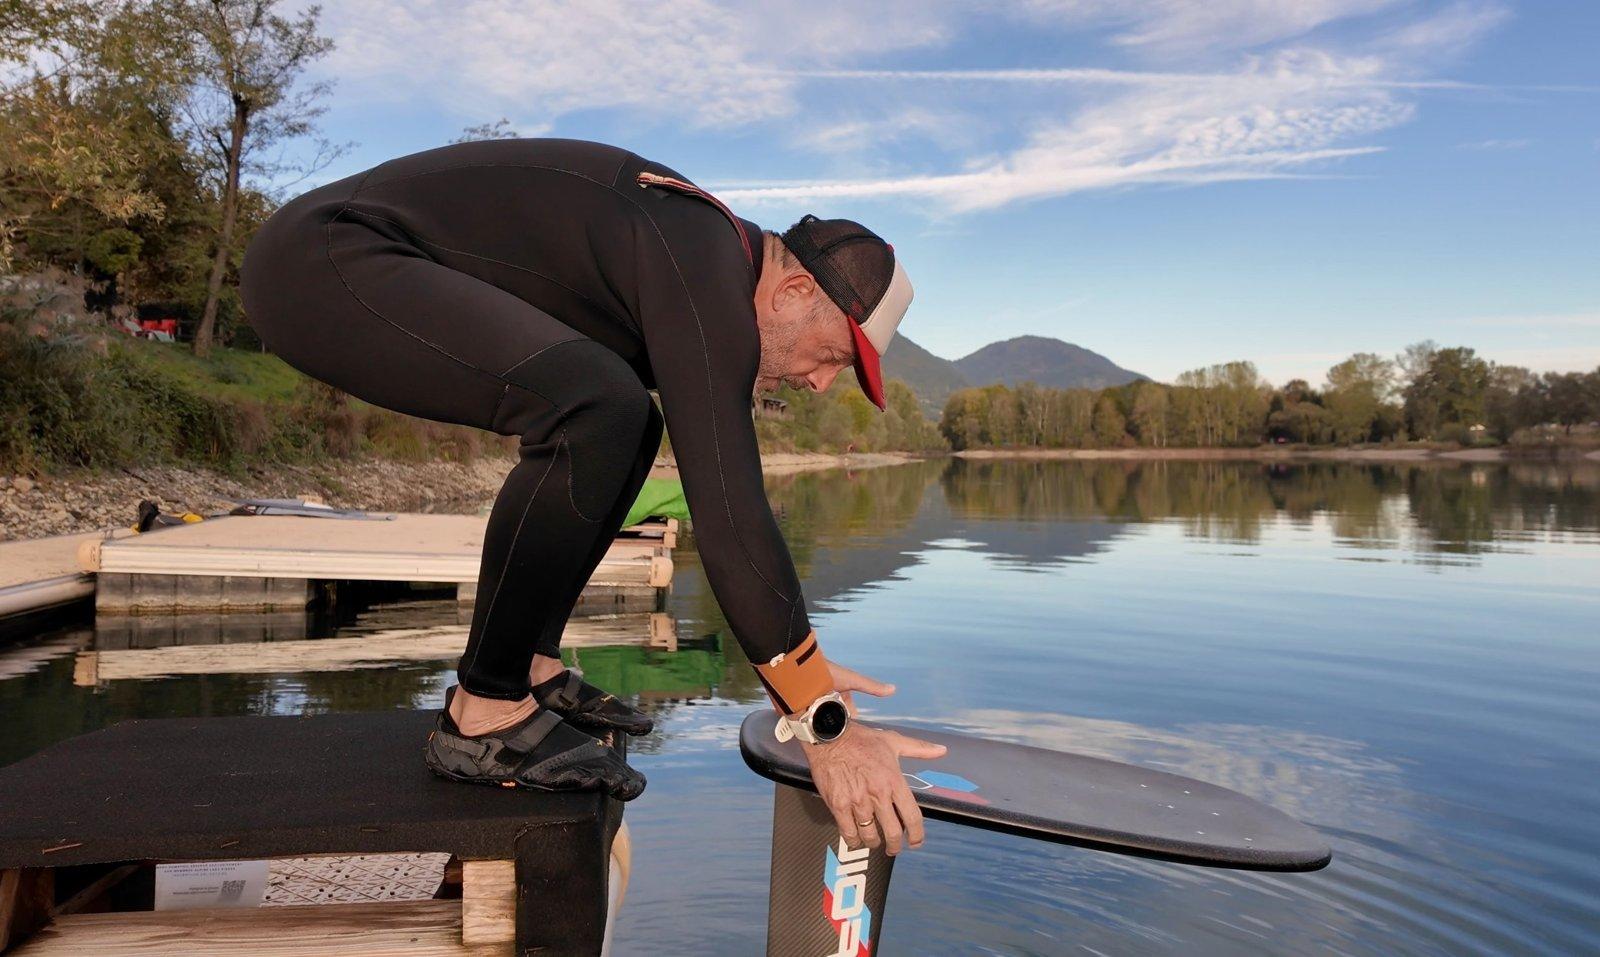
Getting ready: lean over and grab the board by the tail, with the foil in the water.
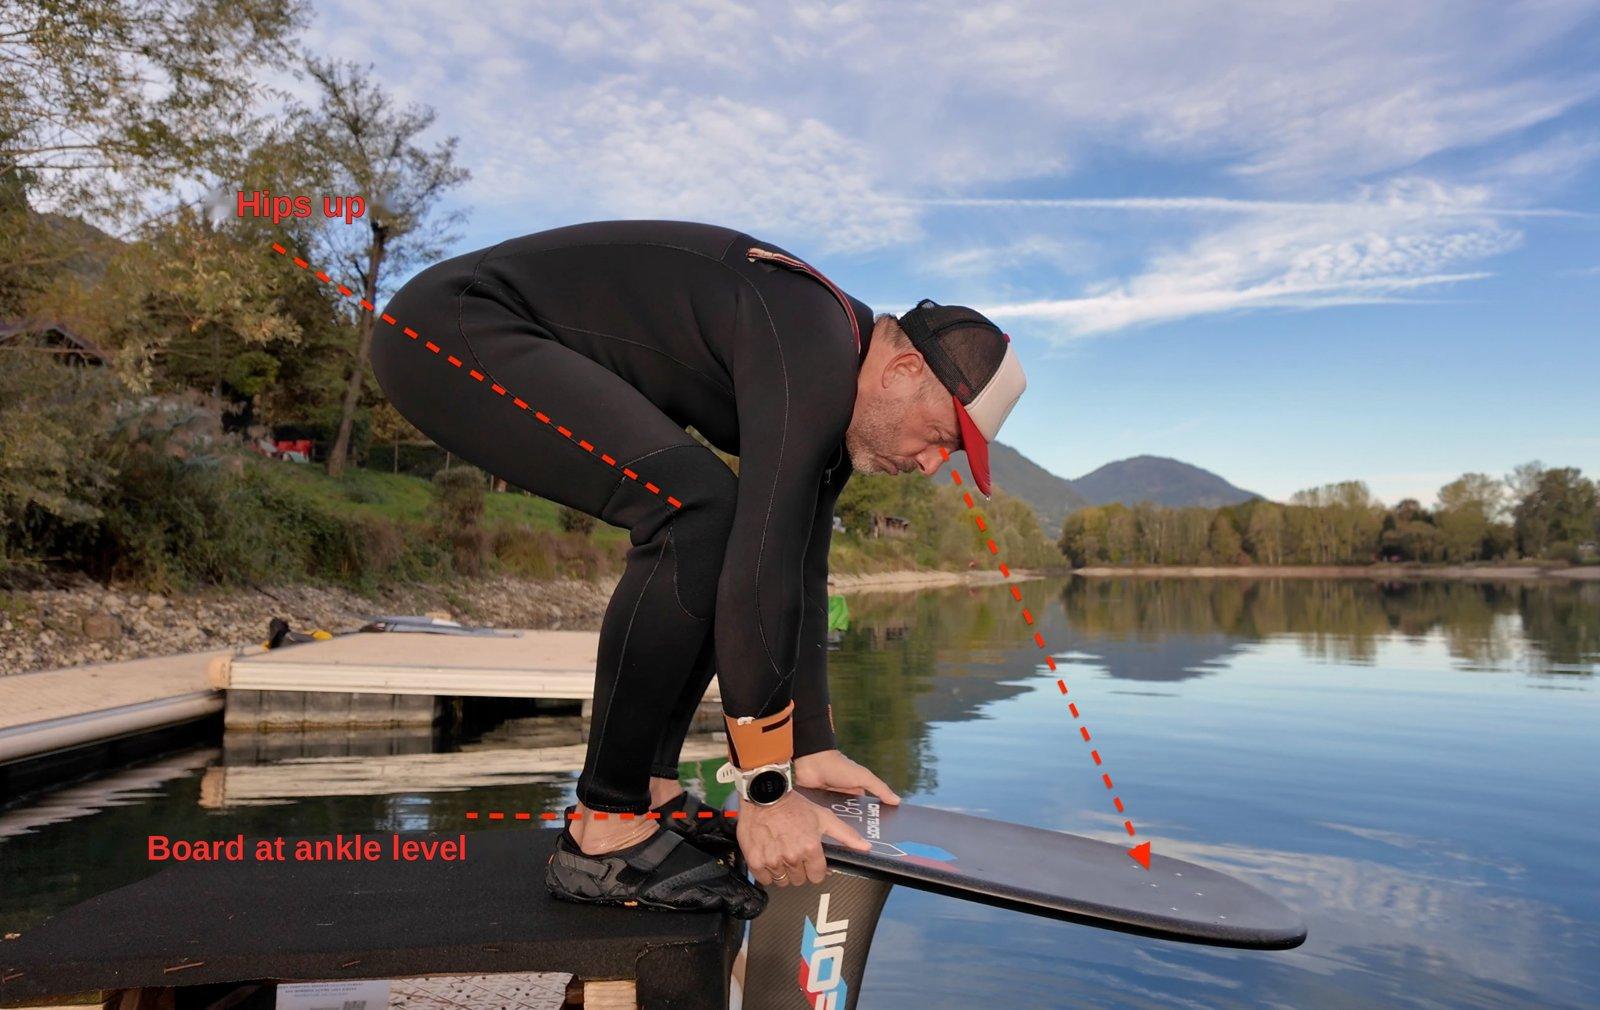
The three key points: hips up, board at ankle level, eyes on the cross.
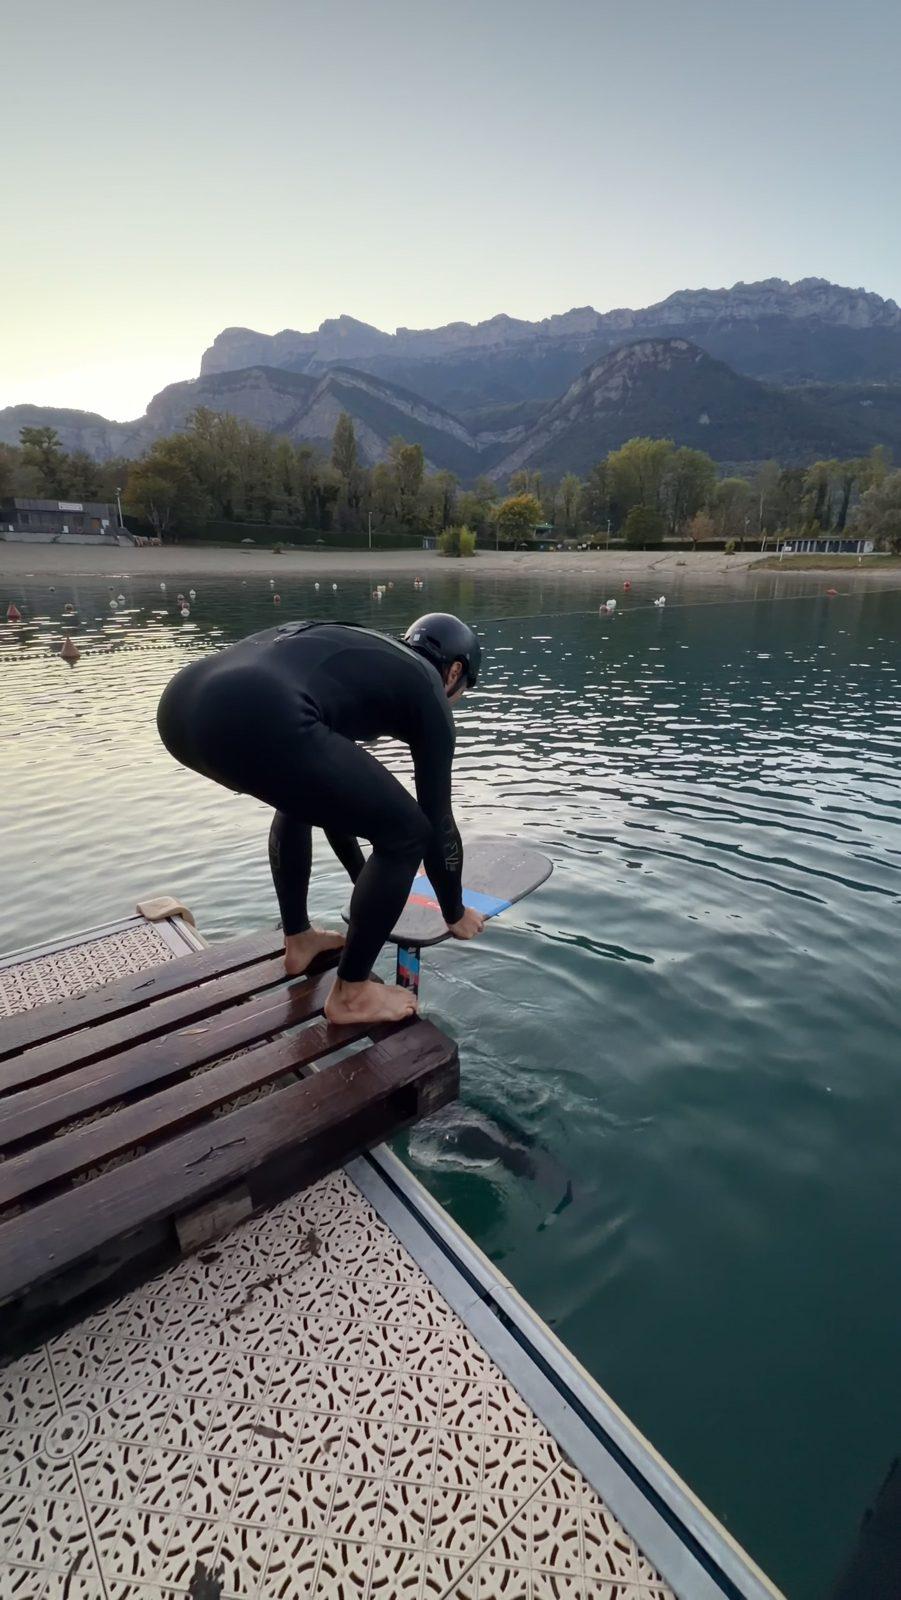
The right starting position: feet parallel to the edge, board held by the tail at ankle level, wing and stabiliser in the water, hips up and eyes on the cross.
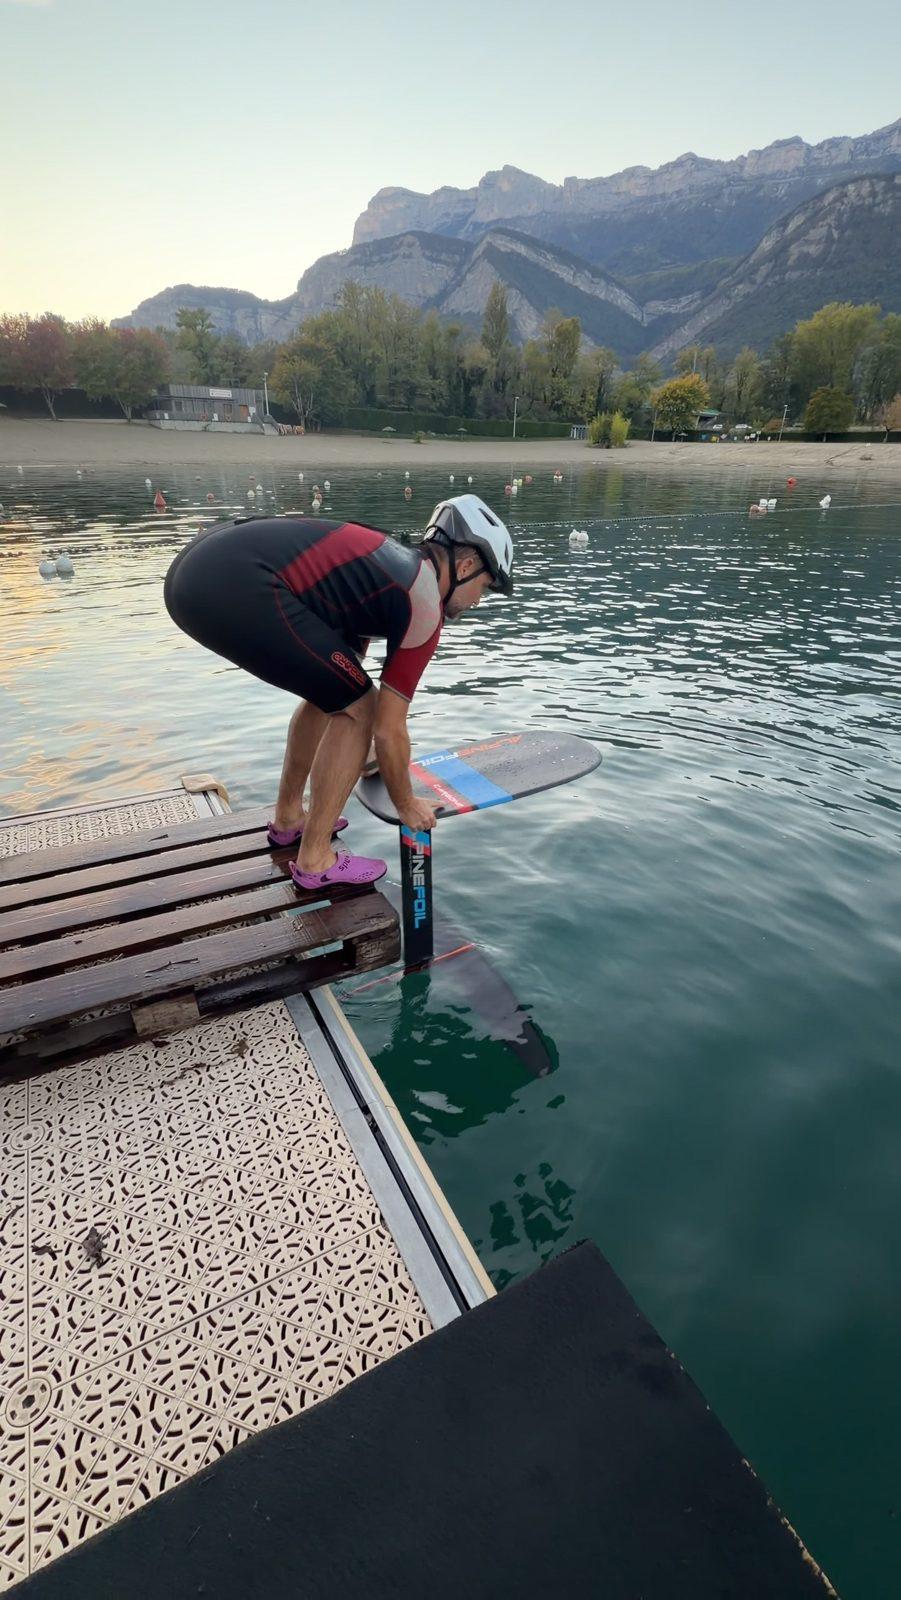
To fix: here the board is too flat. It should be tilted about 5° towards the water. The knees are also very bent: that's the limit, crouching any lower would put the body too far back on the board.
Foil setup for beginners
Slide the foil all the way back in the tracks. It's better to land on the front of the board than on the back.
The Alpinefoil DK 1240 and DK 1360 wings were designed for the drop start, the easiest start to learn pumpfoiling. They lift you from 3 km/h and you can start gliding straight away.
Launching the board
The direction you give the board is what makes the foil stable.
- Hold the board firmly in a precise direction, tilted about 5° towards the water.
- Launch it at about 5 to 6 km/h.
- As you let go, jump up and land on it.
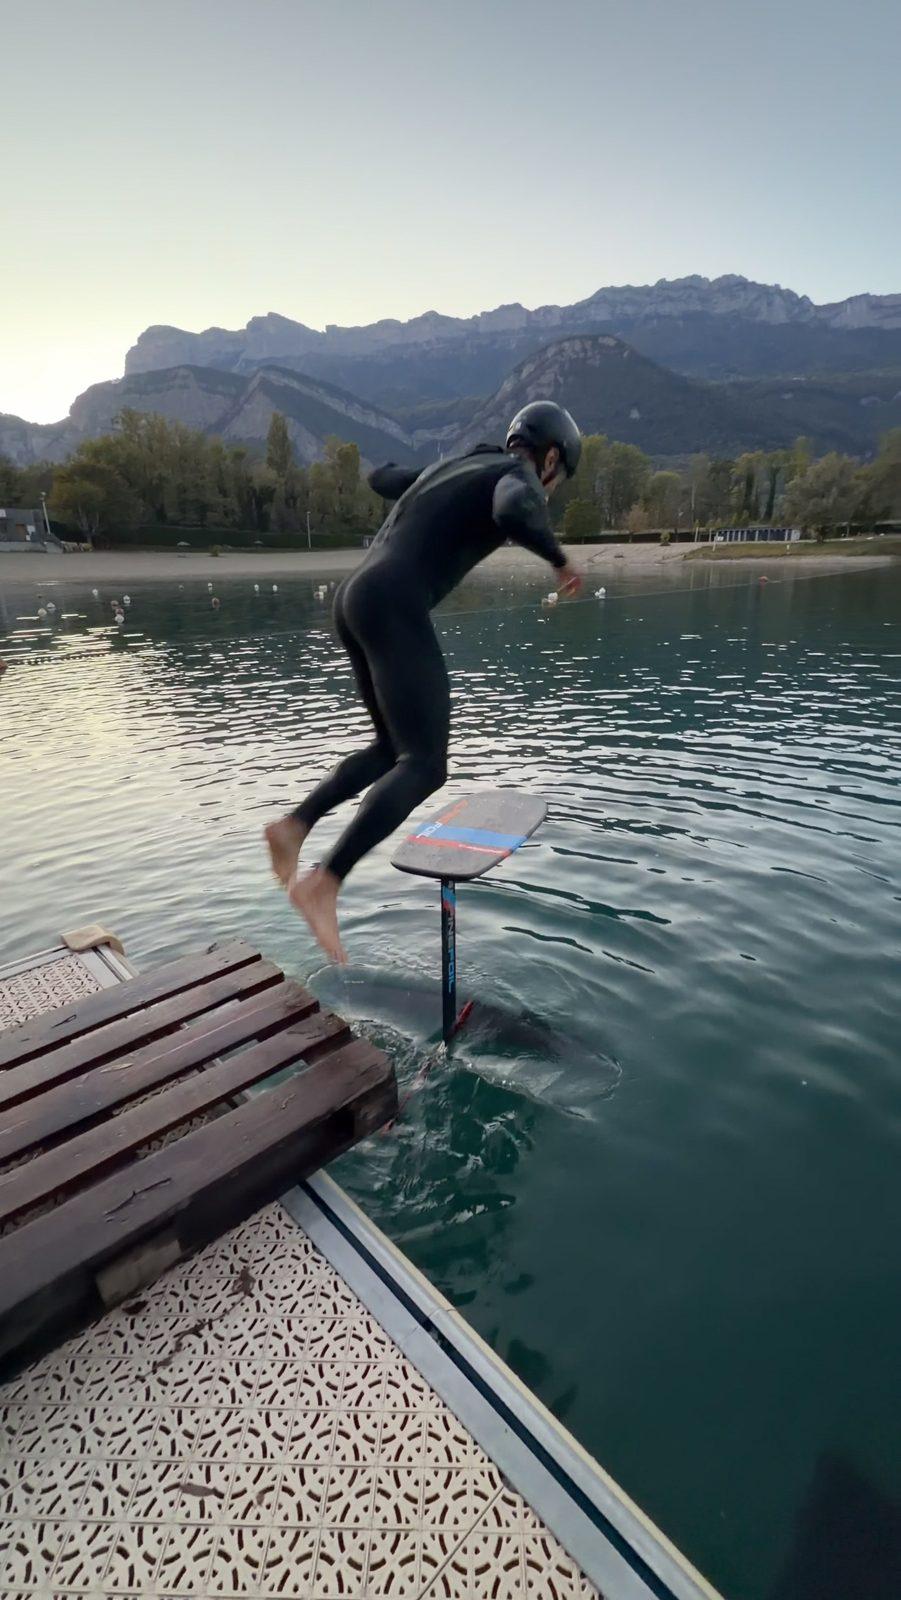
The jump: the board is released and shoots ahead, the rider goes up and forward, chest forward, starting the quarter turn while aiming at the cross.
At first, the only goal is to jump, make the quarter turn and glide as far as possible.
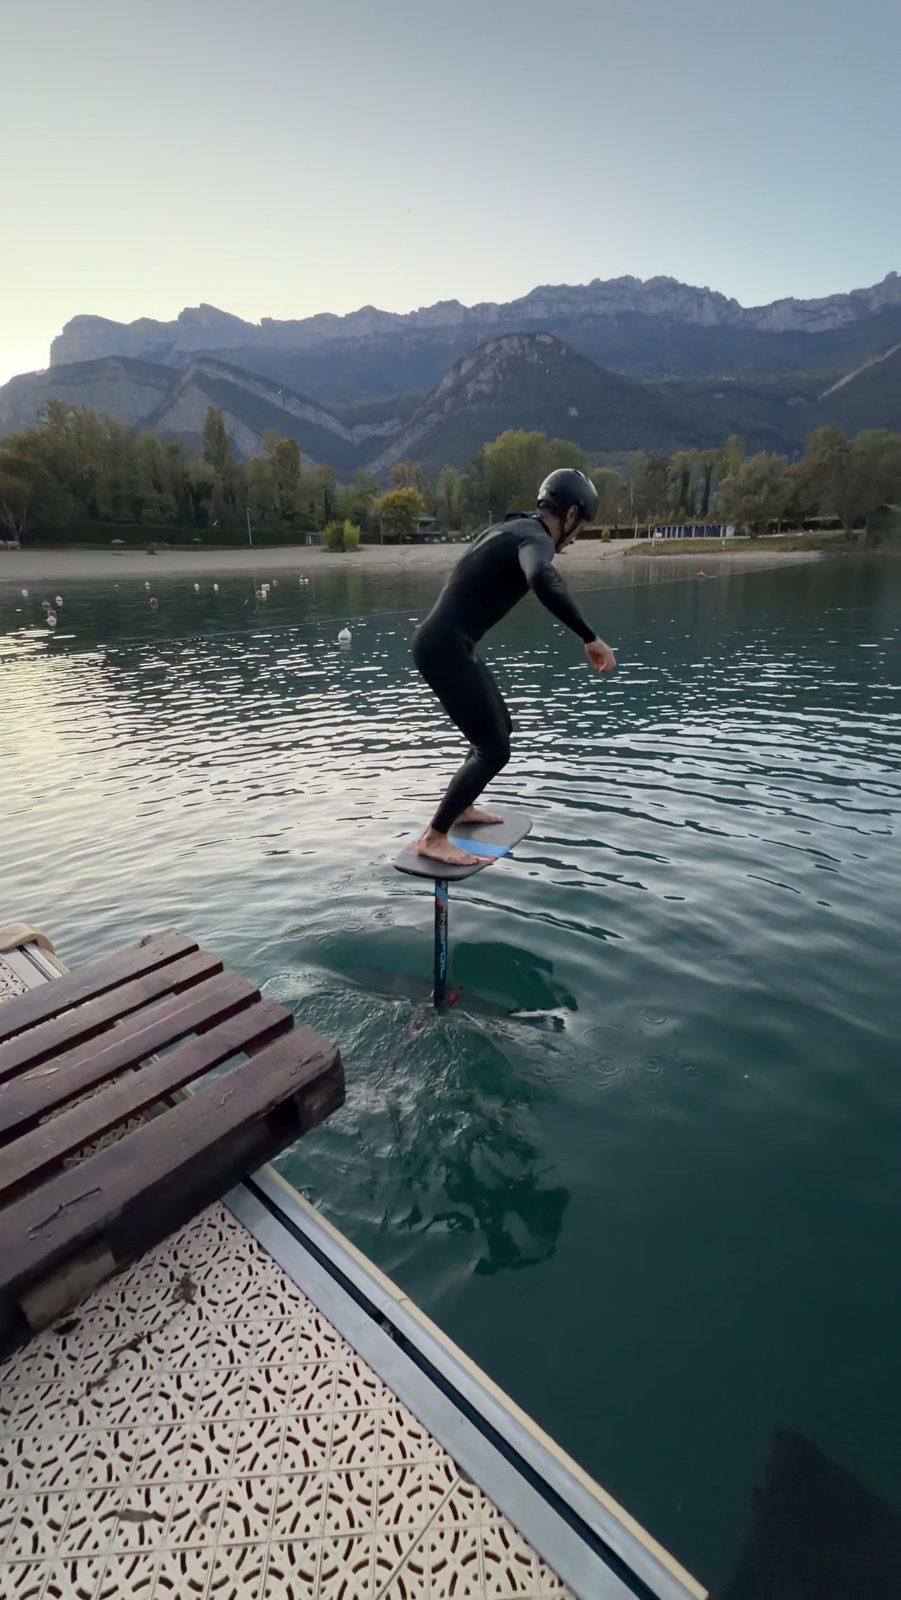
The landing: both feet down at the same time on the centre line, narrow stance, legs bent, weight forward. As soon as your feet are down, lift your eyes to the horizon.
Tip: if you can't make a full 90° rotation yet, launch the board at a slight angle, to the left if you're regular, to the right if you're goofy. Even with an incomplete rotation, your feet will land on the centre line.
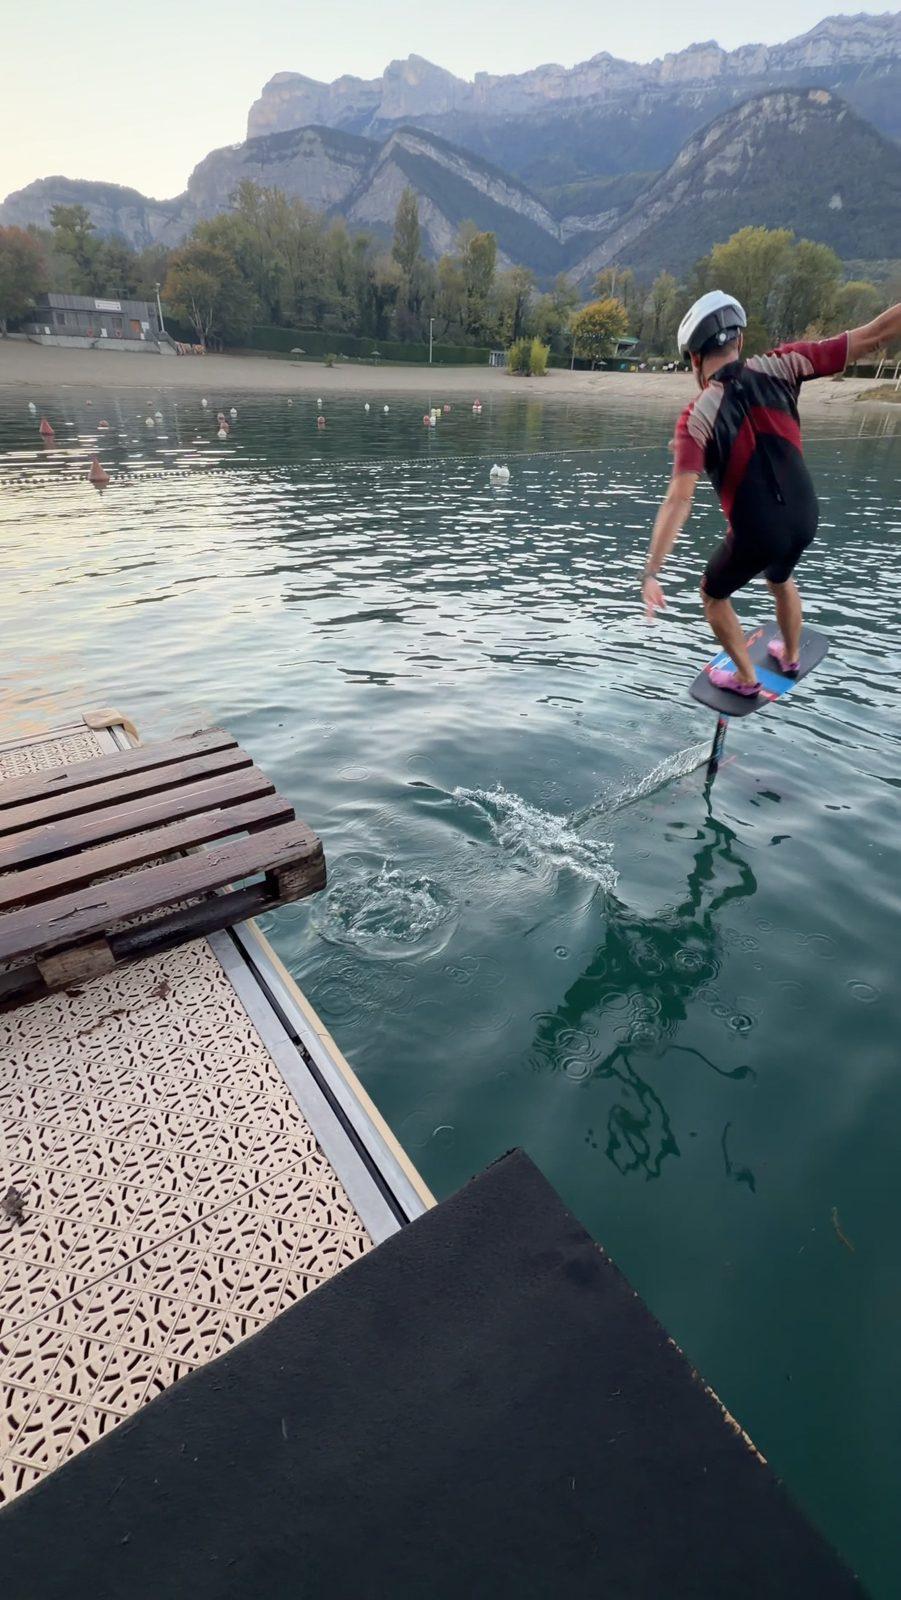
To fix: here the rider is too upright on the board. The shoulders aren't forward, he's tipping back and the foil will jump up. During the glide, keep your shoulders forward and your weight on the front leg to glide as far as possible.
Analyse your falls to progress at pumpfoiling
Every time you fall, check which way you went: it's the best way to improve.
- Backwards: your body is too upright or too far back, your weight isn't forward.
- Forwards (quite rare): your feet aren't close enough together, or you're too far forward on the board.
- Frontside: most often, you're looking at your feet, which tips your shoulders.
- Backside: often, the front foot is on the outside rail because the rotation wasn't complete. Two fixes: work on a truly complete rotation, or launch the board slightly towards your front-foot side (to the left for a regular). Even with an incomplete rotation, you'll land in the right place.
Step 3: your first pumps
Once your glides are good, move on to the next step and learn pumping:
- Do your glide.
- Wait about one second.
- Push once on your back leg. You'll immediately feel the foil rise, and you'll fly a few more metres.
- Control the climb with your front leg, then give a second pump.
Careful: beginners often push far too hard, which makes them bounce. Measure your effort and always keep the offset between front and back. Take it step by step.
My experience: learning to pumpfoil at 53
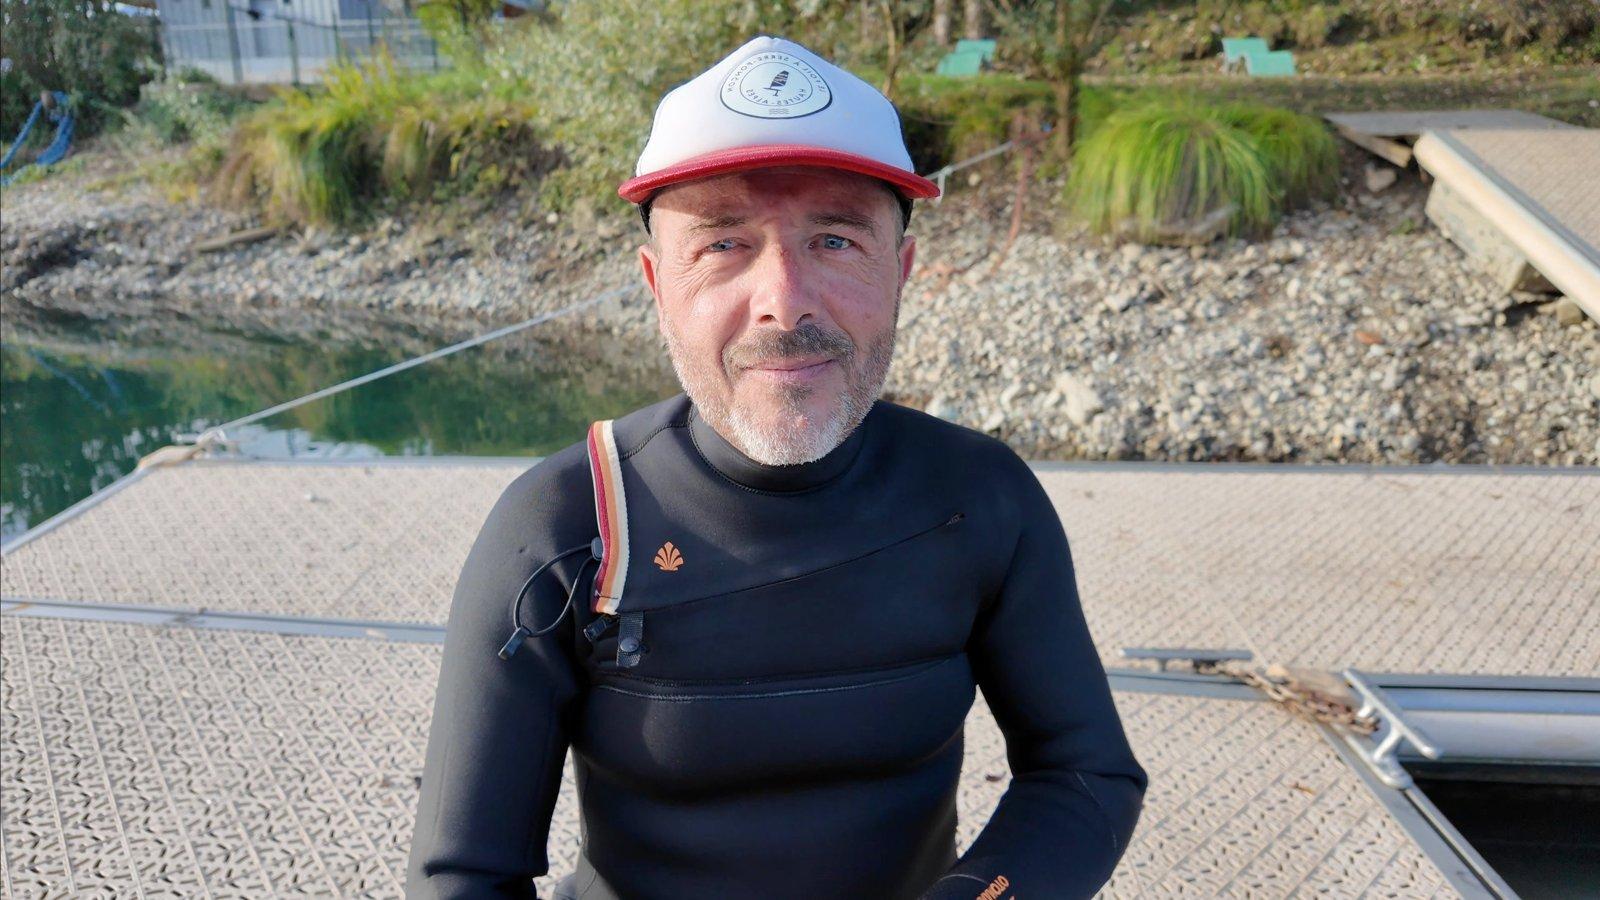
Thanks to this method, on my very first day at 53, I managed to fly about twenty metres, with the DK 1240 designed for the drop start.
Today I'm 55. The sport has evolved, especially with the arrival of the Pierra Manta wing, and my record is 5 km in 21 min 30 s, a year and a half after I started. Far more than I ever imagined.
Yvon's videos made me dream: I watched him go from dock to dock. This year, I went around the small lake of Annecy, in the south. I linked Monteynard beach to the dam. On Lac du Bourget, I did round trips between Le Bourget-du-Lac and the Martine cave, near Bourdeau, and rides of an hour and a half. Fantastic and unimaginable.
Why pumpfoiling is a magical sport
Pumpfoiling is one of the most magical sports I've ever discovered. I never imagined I could become so passionate about it.
- The body: it works your whole body and your cardio. It helped me lose weight, and I've felt much better ever since.
- The feeling: riding over icy, crystal-clear water gives impressive and very intense sensations, close to surfing powder snow.
- Fun from day one: from the outside, you wonder what the point is. But once you've tried it, even over 2 metres, the fun is there. At 5 metres you already feel something; at 10, something else again.
Even with plenty of falls, learning stays fun. It reminds me of my early paragliding days on the training slope, when even tiny hops were a joy.
What next?
Once you're comfortable, start higher: 70 or even 80 cm. The higher you start, the easier it gets.
But don't go too high at the beginning: you'll fall a lot, the foil will jump up, and you risk hurting yourself and damaging your gear.
FAQ: getting started with pumpfoil
How long does it take to learn pumpfoiling?
With the drop start method and a suitable wing, you can fly from your first session: at 53, I flew about twenty metres on my very first day.
Drop start or dock start for beginners?
For beginners, the drop start is simpler: no run-up, a jump with a quarter turn and better foot placement. The running dock start can come later.
What gear do I need to start pumpfoiling?
A high-lift wing designed for the drop start, such as the DK 1240 or the DK 1360, and a board with a visual target. Check out our pumpfoil dock start packs and our full pumpfoil, pumping and dock start range.
Thanks
Special thanks to Yvon Labarthe, who got me started. This method comes from my own experience and from his videos.
Yvon has invented many techniques. I picked this one because I think it's the simplest for people with ordinary ability: no skateboarding background, no champion past, not necessarily exceptional mobility or coordination. Thank you Yvon!
Enjoy your sessions!


Questions / Answers
No questions. Be the first to ask a question.
Add a comment